There’s something about the swirl of dark and light in a marble pound cake that feels like a quiet hug—simple, familiar, and a little bit nostalgic. I love how the contrasting batters dance together in the pan, creating a visual treat even before the first slice. It’s a cake that invites you to pause and appreciate the messy beauty of homemade baking.
This recipe isn’t about perfection; it’s about the joy of mixing, swirling, and watching those colors blend into a cozy mosaic. Every time I make it, I remember lazy Sunday afternoons, the smell of butter and cocoa filling the kitchen, and the satisfying crack of the crust as it cools. It’s a humble, honest cake that tastes like a little piece of comfort, no matter the occasion.
Focusing on the visual harmony and emotional comfort of marble pound cake, I see it as a canvas for imperfect, cozy baking—where each swirl tells a story of nostalgic afternoons, messy kitchens, and the simple joy of mixing and swirling flavors into a homemade masterpiece.
Celebrating Imperfect Swirls
- Making this cake always feels like a small act of rebellion against perfect-looking desserts—it’s messy, cozy, and so worth it.
- There’s a quiet pride in swirling those batters; each cake feels like a little handmade statement, full of love and imperfections.
- Honestly, the smell of cocoa and vanilla filling the house when it’s baking takes me back to childhood afternoons, simple and sweet.
- Seeing the marble pattern emerge in the oven is oddly satisfying—I still get excited every single time I slice into it.
- This cake reminds me that sometimes, the most beautiful moments come from imperfect swirls and spontaneous baking adventures.
The story behind this recipe
- Making this marble pound cake always takes me back to my grandmother’s kitchen, where the air was thick with the scent of vanilla and cocoa. She’d swirl the batters with a kind of gentle chaos, never fussing too much over perfect lines. That imperfect beauty, the way the dark and light marbled together, felt like a small act of love in the chaos of daily life.
- Every time I bake it, I remember her hands, steady and sure, mixing batter while humming an old tune. It’s a humble cake, but it holds stories—of lazy afternoons, of sharing slices with friends, of the quiet joy found in swirling batter and watching it bake into a cozy mosaic.
- heading: Celebrating Imperfect Swirls
History and Fun Facts
- The marble effect in this cake dates back to European baking traditions, where visual appeal was as important as flavor.
- Originally, marble pound cakes were a way to use leftover chocolate and vanilla batters, creating a decorative treat from simple ingredients.
- The swirl pattern was believed to symbolize the blending of opposing forces—like dark and light—making each cake unique.
- In the 19th century, pound cakes were called ‘pound’ because they used a pound each of butter, sugar, eggs, and flour—marbling was a later decorative twist.
Ingredient breakdown
- Butter: I use high-quality, European-style butter for its rich, creamy flavor that makes the cake feel indulgent. Swap with a good local butter if needed, but avoid margarine for best taste.
- Sugar: I prefer superfine sugar because it dissolves quickly, giving the batter a silky texture. You can use regular granulated, but beat it a bit longer to ensure smoothness.
- Eggs: Fresh eggs help create a tender crumb and vibrant marbling. If eggs are small, consider adding an extra to maintain richness and structure.
- Vanilla extract: I love a good pure vanilla for depth, but almond extract can add a lovely nutty aroma—use sparingly to avoid overpowering the swirl.
- Cocoa powder: Unsweetened, Dutch-processed cocoa gives a deep, smoky flavor. Sift it well to avoid lumps and brighten the dark swirl’s color.
- Flour: I reach for all-purpose flour; it’s reliable. For a softer crumb, a spoonful of cornstarch can lighten the texture subtly.
- Milk: Whole milk adds moisture and richness. If you want a lighter cake, substitute with buttermilk for a tangy twist and extra tender crumb.
Spotlight on key ingredients
Butter:
- I prefer European-style butter for its rich, creamy flavor that makes the cake indulgent. Swap with a good local butter if needed, but avoid margarine for best taste.
- Cocoa powder: Dutch-processed, unsweetened cocoa gives a deep smoky flavor. Sift it well to avoid lumps and brighten the dark swirl’s color.
- Vanilla extract: Pure vanilla adds warmth and depth. Use a high-quality extract, or a splash of vanilla bean paste for a richer aroma.
Cocoa powder:
- The key to that intense, smoky flavor; it behaves like a chocolate concentrate during baking—be generous, but sift to avoid lumps.
- Vanilla extract: Brightens the batter and enhances the swirl; a good splash makes all the difference in aroma and flavor complexity.
Notes for ingredient swaps
- Dairy-Free: Swap butter for coconut oil or vegan butter. The flavor shifts subtly, and the texture might be a touch denser.
- Sugar Alternatives: Use honey or maple syrup instead of sugar. Reduce liquid slightly to compensate for moisture and watch for a different crumb.
- Egg-Free: Replace each egg with a flaxseed or chia seed gel (1 tablespoon seeds + 3 tablespoons water). Expect a slightly denser, moister crumb.
- Gluten-Free: Use a 1-to-1 gluten-free flour blend. The marbling will be just as striking, but the texture may be a bit more delicate.
- Cocoa Powder: Substitute with carob powder for a slightly sweeter, milder chocolate flavor, or try a spicy cinnamon cocoa blend for warmth.
- Milk: Almond or oat milk can replace whole milk. The cake may be a little less rich, but still moist and tender.
- Vanilla Extract: Lemon or orange zest with a splash of extract can brighten the flavor if vanilla isn’t available, adding a fresh citrus note.
Equipment & Tools
- Loaf pan: Holds the batter during baking and shapes the cake.
- Electric mixer or whisk: Creams butter and sugar, and incorporates eggs and dry ingredients smoothly.
- Spatula or spoon: Divides and gently swirls the batters in the pan.
- Cooling rack: Allows the cake to cool evenly and prevents sogginess.
- Toothpick or cake tester: Checks the cake’s doneness by testing the center.
Step-by-step guide to marble pound cake
- Preheat your oven to 175°C (350°F). Grease a 9×5 inch loaf pan and line it with parchment paper for easy release.
- In a large mixing bowl, cream together 1 cup (226g) unsalted butter and 1 1/2 cups (300g) sugar until light and fluffy, about 3-4 minutes on medium speed.
- Add 4 large eggs, one at a time, beating well after each addition. Scrape down the sides of the bowl to keep everything incorporated evenly.
- Stir in 2 teaspoons of vanilla extract. In a separate bowl, whisk together 2 1/2 cups (310g) all-purpose flour, 1 teaspoon baking powder, and a pinch of salt.
- Gradually add the dry ingredients to the butter mixture, alternating with 1/2 cup (120ml) whole milk, starting and ending with the flour mixture. Mix just until combined.
- Divide the batter evenly into two bowls. To one bowl, sift in 1/4 cup (25g) unsweetened Dutch-processed cocoa powder and fold gently to combine.
- Spoon dollops of vanilla batter and chocolate batter into the prepared pan, alternating and then swirling with a skewer or knife to create a marbled effect. Do not overmix—aim for a gentle swirl.
- Bake for 55-60 minutes. Check for doneness by inserting a toothpick into the center; it should come out with a few moist crumbs—not wet batter.
- If the top is browning too quickly, tent with foil after 40 minutes. The cake should have a crackly, golden crust with a marbled pattern peeking through.
- Remove from oven and let cool in the pan for 15 minutes. Then, transfer to a wire rack to cool completely before slicing.
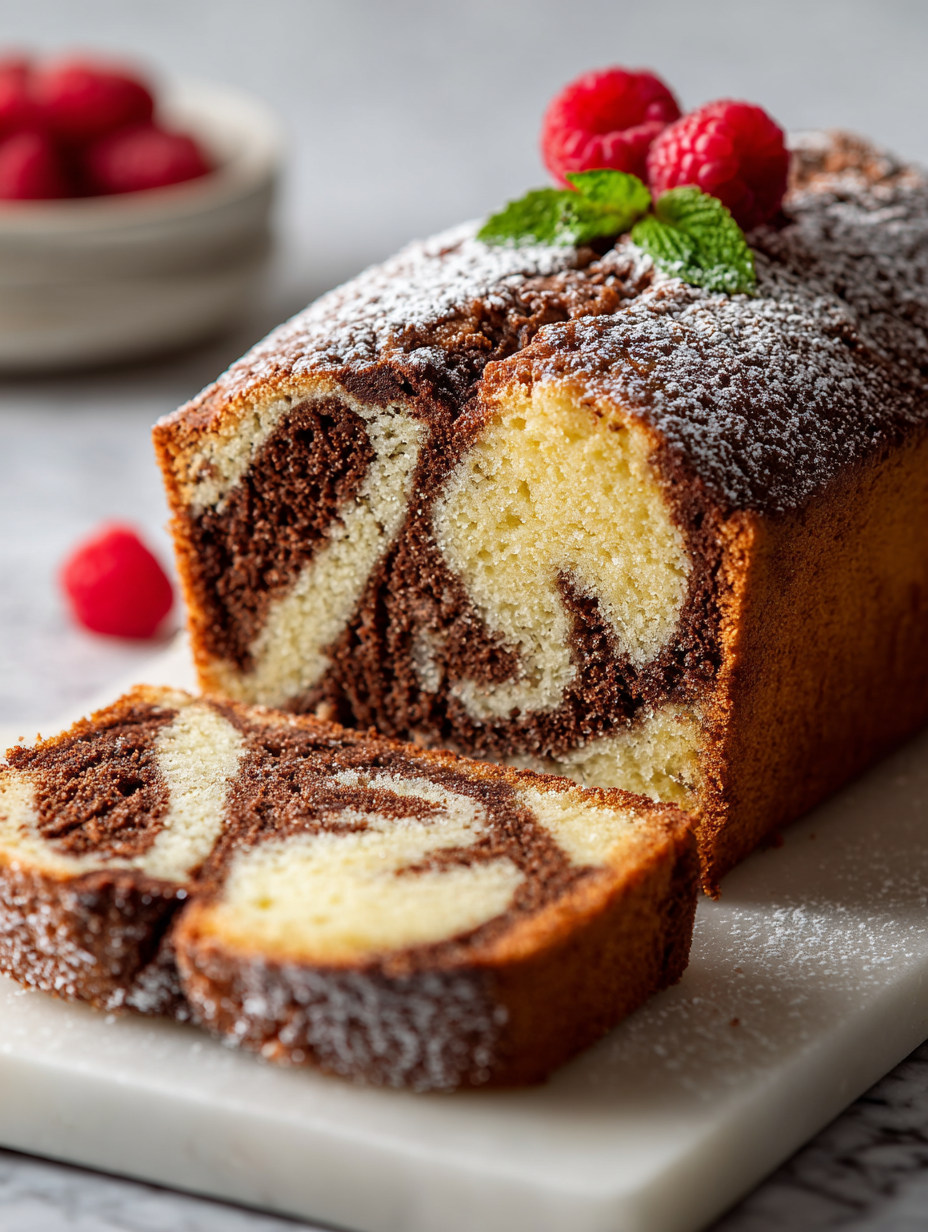
Let the cake cool completely on a wire rack before slicing. Resting allows the crumb to set, making slices cleaner and neater. Slice with a serrated knife for best results, revealing the swirling marble pattern beautifully.
How to Know It’s Done
- Crust is golden and crackly, with visible marbling at the surface.
- Toothpick inserted in the center comes out with moist crumbs, not wet batter.
- Cake feels firm but springy when lightly pressed, indicating proper doneness.
Marble Pound Cake
Ingredients
Equipment
Method
- Preheat your oven to 175°C (350°F). Grease a 9×5 inch loaf pan and line it with parchment paper for easy removal.
- In a large mixing bowl, cream together the softened butter and superfine sugar until the mixture is light, fluffy, and fragrant—about 3-4 minutes on medium speed. You’ll notice it turns pale and feels smooth to the touch.
- Add eggs one at a time, beating well after each addition. The batter should become glossy and slightly thickened, with a gentle ribboning when you lift the beaters.
- Mix in the vanilla extract until fully incorporated. The aroma will deepen and the batter will look smooth and uniform.
- In a separate bowl, whisk together the sifted flour, baking powder, and a pinch of salt. Gradually add the dry ingredients to the wet mixture in three parts, alternating with the milk, starting and ending with the flour. Mix just until combined—don’t overmix, or the cake may become dense.
- Divide the batter evenly into two bowls. Sift the cocoa powder into one bowl and gently fold it in until the batter is uniformly dark, creating a rich chocolate color.
- Spoon dollops of vanilla and cocoa batter into the prepared loaf pan, alternating between the two. Use a skewer or knife to gently swirl the batters together—just a few gentle strokes to create a marbled pattern, without fully mixing the colors.
- Bake in the preheated oven for 55-60 minutes. Check for doneness by inserting a toothpick into the center; it should come out with moist crumbs, not wet batter. The crust should be golden and crackly.
- Allow the cake to cool in the pan for about 15 minutes. Then, transfer it to a wire rack and let it cool completely—this helps the crumb set and prevents crumbling when slicing.
- Slice the cake with a serrated knife to reveal the beautiful marbled pattern inside. Serve slices slightly warm or at room temperature, enjoying the tender crumb and rich aroma of vanilla and cocoa.
Top tips for perfect marble pound cake
- Bolded mini-head: Use room temperature ingredients → Ensures smooth, creamy batter without lumps, making swirling easier.
- Bolded mini-head: Gently swirl the batters → Avoid overmixing; a light, marbled pattern keeps the swirl distinct and beautiful.
- Bolded mini-head: Sift cocoa powder → Prevents lumps and brightens the dark swirl for a more even, rich color.
- Bolded mini-head: Check oven temperature → Use an oven thermometer; 175°C (350°F) is ideal for even baking and crust development.
- Bolded mini-head: Don’t open the oven early → Wait at least 45 minutes; sudden temperature drops cause cracks or sinking.
- Bolded mini-head: Cool completely before slicing → Prevents crumbling; a wire rack allows air circulation for even cooling.
- Bolded mini-head: Use a serrated knife → Cuts through crust and crumb cleanly, revealing the beautiful marbling inside.
Common mistakes and how to fix them
- FORGOT to preheat oven → Always preheat to ensure even baking.
- DUMPED batter into pan → Gently spoon and swirl for a marbled effect.
- OVER-TORCHED crust → Cover with foil if browning too fast, check for doneness.
- MISSED mixing dry ingredients properly → Sift to prevent lumps and ensure even color.
Quick Fixes and Pantry Swaps
- When batter appears grainy, splash in a bit more milk and whisk until smooth.
- If the swirl isn’t distinct enough, dump the batter back into the bowl and gently fold again.
- Splash a few drops of vanilla on the crust if it looks dull—enhances aroma instantly.
- Patch a cracked top with a little extra batter and cover with foil—smooths out cracks.
- Shield the cake with foil if it starts to over-brown—keep that rich, deep crust shimmering.
Prep, store, and reheat tips
- Prepare the batter up to a day ahead; keep it covered in the fridge to preserve freshness and prevent drying out.
- Bake the cake a day in advance; store at room temperature in an airtight container for up to 2 days, keeping the crust crisp and the flavors vibrant.
- For longer storage, wrap the cooled cake tightly in plastic wrap and freeze for up to 2 months. Thaw at room temperature before serving, and note that flavors may mellow slightly.
- Reheat slices briefly in a 150°C (300°F) oven for 5-7 minutes until warm. The aroma of vanilla and cocoa will revive, and the crumb will regain some softness.
Top questions about marble pound cake
1. Can I use melted butter instead of softened butter?
Yes, you can use melted butter instead of softened, but the batter might be a bit runnier, so adjust the flour slightly. The marble pattern will still come out beautiful, just be gentle when swirling.
2. Why did my cake crack on top?
If the cake cracks on top, it’s usually because it baked too fast or the oven was too hot. Cover with foil halfway through baking and lower the temperature slightly.
3. How do I know when the cake is fully baked?
A toothpick inserted into the center should come out with moist crumbs, not wet batter. If it’s clean, the cake is done. When cooled, it should feel firm but springy to touch.
4. What consistency should the batter be?
If your batter is too thick or dry, add a splash more milk. If it’s too runny, add a little more flour. The batter should be thick but pourable, like soft pudding.
5. How should I store leftover marble pound cake?
Store leftover cake wrapped tightly in plastic in the fridge for up to 3 days. For longer storage, freeze slices wrapped in foil and reheat briefly in the oven to revive freshness.
6. Can I customize the swirl flavors?
You can swap cocoa powder for melted chocolate or cacao nibs for different textures and flavors. For a fruitier twist, swirl in berry compote before baking.
7. What’s the best vanilla to use?
Using high-quality vanilla extract really deepens the aroma and flavor. If you don’t have vanilla, almond or citrus zest can add a lovely aroma as well.
8. How do I get a more defined marble pattern?
If the batter is too streaky and the pattern isn’t clear, gently fold it again or swirl with a skewer to enhance the marbling effect before baking.
9. How do I prevent over-browning?
Oven temperature accuracy is key. Use an oven thermometer and bake at 175°C (350°F). If the crust is browning too fast, tent with foil during the last 15 minutes.
10. Why is my cake dense or crumbly?
If the cake feels dense or crumbly, it might need a bit more mixing or a slightly longer baking time. Ensure your ingredients are at room temperature for a smoother batter.
This marble pound cake isn’t just about looks; it’s a quiet celebration of messy, nostalgic baking. Every slice reveals those imperfect swirls that tell a story of comfort and home. It’s the kind of treat that feels like a small, honest victory in the kitchen.
In a world rushing past, creating this cake is a slow, mindful act—one that connects me back to simpler times and cozy afternoons. Sharing it, slicing through that marbled pattern, feels like passing on a bit of that quiet joy to others. It’s a humble reminder that beauty often lives in those little imperfections.

Hi, I’m Charlotte Hayes, the creator and storyteller behind Lost in the Aroma. If you’ve ever closed your eyes while something simmered on the stove just to take in the scent, then you already understand what this space is about. For me, aroma is memory. It is emotion. It is the first sign that something beautiful is about to be shared. Lost in the Aroma is where I bring together recipes, sensory storytelling, and my lifelong love for food. I am so glad you’re here.


Leave a Reply