This chocolate pound cake isn’t about overwhelming sweetness. It’s about finding that perfect balance—the deep, almost smoky cocoa paired with just enough butter richness to keep it grounded. I’ve always loved how a good cocoa’s bitterness can elevate a simple loaf into something more contemplative, almost meditative to bake and savor.
What makes this recipe special isn’t just the ingredients but how tiny adjustments—like the quality of cocoa or a splash of coffee—can shift the flavor from ordinary to memorable. It’s a cake that rewards patience and attention, where the subtle nuances of chocolate come alive with every bite. That quiet complexity keeps me coming back, even on days I need a little comfort.
Focusing on the overlooked importance of balancing richness and subtle bitterness in chocolate pound cake, this recipe emphasizes how the quality of cocoa and subtle adjustments can turn a simple loaf into a nuanced, almost meditative baking experience.
Balancing Bitterness and Richness
- Baking this cake always takes me back to my grandmother’s kitchen, where the smell of cocoa filled the air on lazy Sunday afternoons.
- I love how a tiny pinch of sea salt can make the chocolate flavor pop, turning each bite into a little burst of joy.
- There’s a quiet satisfaction in watching this loaf turn a deep, glossy brown—like a dark mirror reflecting my mood.
- Sometimes I add a splash of espresso just to deepen the chocolate notes—it’s an unspoken secret that makes the cake feel more grown-up.
- Sharing this cake with friends feels like passing around a little piece of comfort, especially on rainy days when everything feels a bit slower.
The story behind this recipe
- This chocolate pound cake came about during a particularly chaotic week when I needed something straightforward yet deeply satisfying. I was craving the kind of dessert that feels like a warm hug but doesn’t require fuss or fancy ingredients. Baking it became a kind of ritual — a way to slow down and ground myself amid the noise.
- What I love about this recipe is how it’s shaped by small, honest choices: good cocoa, real butter, and a gentle mixing. It’s not about perfection but about embracing the process and the little surprises along the way. Sometimes, I’ll sneak in a handful of chopped nuts or a swirl of jam — little tweaks that turn a simple loaf into a personal treat.
- heading
- story_type
Chocolate Pound Cake Trivia
- Chocolate pound cake has roots in European baking traditions, where dense, rich loaf cakes were popular for special occasions.
- The classic pound cake originated in the 18th century, named for its traditional ingredient ratios—one pound each of butter, sugar, eggs, and flour.
- Cocoa was added to the traditional pound cake in the early 20th century as chocolate became more accessible, giving birth to the chocolate variation we cherish today.
- During World War II, rationing led bakers to experiment with substitutes, which subtly influenced the development of richer, more nuanced chocolate cakes.
- This recipe’s emphasis on balancing cocoa’s bitterness reflects a modern appreciation for complex flavors over straightforward sweetness.
Ingredient breakdown: key components
- Unsweetened cocoa powder: I prefer Dutch-processed for a richer, smoother chocolate flavor—aim for a deep, almost smoky scent when whisking it in. Swap with natural cocoa if you want a brighter, tangier note.
- Butter: I always use unsalted, high-quality butter for that lush, creamy mouthfeel. If you’re out, margarine can be a quick substitute, but it dulls the depth of flavor a bit.
- Eggs: Fresh large eggs are my go-to—they help keep the batter cohesive and give a tender crumb. If you need to, you can substitute with an equivalent amount of egg replacer for a dairy-free version.
- Granulated sugar: I stick with classic white sugar for a clean sweetness that balances the cocoa’s bitterness. Brown sugar adds moisture and warmth, if you want a richer, more caramelized note.
- All-purpose flour: I sift it well to avoid lumps and ensure a light texture. Whole wheat can be used for a nuttier flavor, but it makes the crumb denser.
- Coffee (optional): A splash of brewed espresso deepens the chocolate flavor—think smoky, intense, almost like a secret ingredient. Skip if you prefer a straightforward cocoa punch.
- Vanilla extract: I love a good splash of vanilla to round out the chocolate’s bitterness—use quality vanilla or a splash of vanilla bean paste for extra depth.
Spotlight on key ingredients
Unsweetened cocoa powder:
- I prefer Dutch-processed for a richer, smoother chocolate flavor—aim for a deep, almost smoky scent when whisking it in. Swap with natural cocoa if you want a brighter, tangier note.
- Butter: I always use unsalted, high-quality butter for that lush, creamy mouthfeel. If you’re out, margarine can be a quick substitute, but it dulls the depth of flavor a bit.
- Eggs: Fresh large eggs are my go-to—they help keep the batter cohesive and give a tender crumb. If you need to, you can substitute with an equivalent amount of egg replacer for a dairy-free version.
Butter:
- I always use unsalted, high-quality butter for that lush, creamy mouthfeel. If you’re out, margarine can be a quick substitute, but it dulls the depth of flavor a bit.
- Eggs: Fresh large eggs are my go-to—they help keep the batter cohesive and give a tender crumb. If you need to, you can substitute with an equivalent amount of egg replacer for a dairy-free version.
Notes for ingredient swaps
- Dairy-Free: Swap butter for coconut oil or vegan margarine; expect a slightly different richness and a subtler coconut aroma.
- Sugar-Free: Use erythritol or other granular sweeteners; note that texture and sweetness intensity may vary slightly.
- Gluten-Free: Replace all-purpose flour with a blend of almond meal and gluten-free flour; cakes may be denser and have a nuttier flavor.
- Dark Chocolate: Substitute chopped dark chocolate or chocolate chips for some or all of the cocoa powder for added texture and melt-in-your-mouth richness.
- Coffee: Use strongly brewed espresso or omit entirely for a milder chocolate flavor—coffee enhances depth but isn’t essential.
- Cocoa Type: Dutch-processed for smoother, mellow taste; natural cocoa for brighter, more tangy chocolate notes—adjust baking powder if needed.
- Flavor Boost: Add a pinch of cinnamon or chili powder for a subtle, warming twist; keep it balanced so it doesn’t overpower the chocolate.
Equipment & Tools
- Loaf pan: Holds the batter during baking, shaping the cake.
- Mixer (hand or stand): Creams butter and sugar, and mixes ingredients evenly.
- Spatula: Smoothing batter in the pan and folding ingredients.
- Cooling rack: Allows the cake to cool evenly and prevents sogginess.
- Toothpick or cake tester: Checks doneness without damaging the cake surface.
Step-by-step guide to baking
- Preheat your oven to 175°C (350°F). Grease a 9×5 inch loaf pan thoroughly with butter and dust with cocoa powder to prevent sticking.
- In a large mixing bowl, whisk together 1 1/2 cups (190g) all-purpose flour, 1/2 cup (50g) Dutch-processed cocoa powder, and 1 teaspoon baking powder. Set aside.
- In another bowl, cream 3/4 cup (170g) unsalted butter and 1 1/2 cups (300g) granulated sugar until pale and fluffy, about 3-4 minutes. Use a hand or stand mixer on medium speed.
- Add 3 large eggs, one at a time, beating well after each addition. Incorporate 1 teaspoon vanilla extract. The mixture should be smooth and slightly thickened.
- Incorporate dry ingredients in three additions, alternating with 1/2 cup (120ml) brewed espresso or hot water, beginning and ending with the dry. Mix just until combined. Do not overmix, or the cake can become dense.
- Pour the batter into the prepared loaf pan. Smooth the top with a spatula. Tap gently to release air bubbles.
- Bake for 55–60 minutes. The cake is done when a toothpick inserted into the center comes out with moist crumbs, and the top feels firm but springs back slightly.
- Remove from oven and let cool in the pan for 15 minutes. Then transfer to a wire rack to cool completely before glazing or serving.
Let the cake cool completely on a wire rack before slicing. For best flavor, wrap loosely in plastic wrap and let rest overnight. Serve plain or dusted with cocoa powder, or topped with a simple chocolate glaze.
How to Know It’s Done
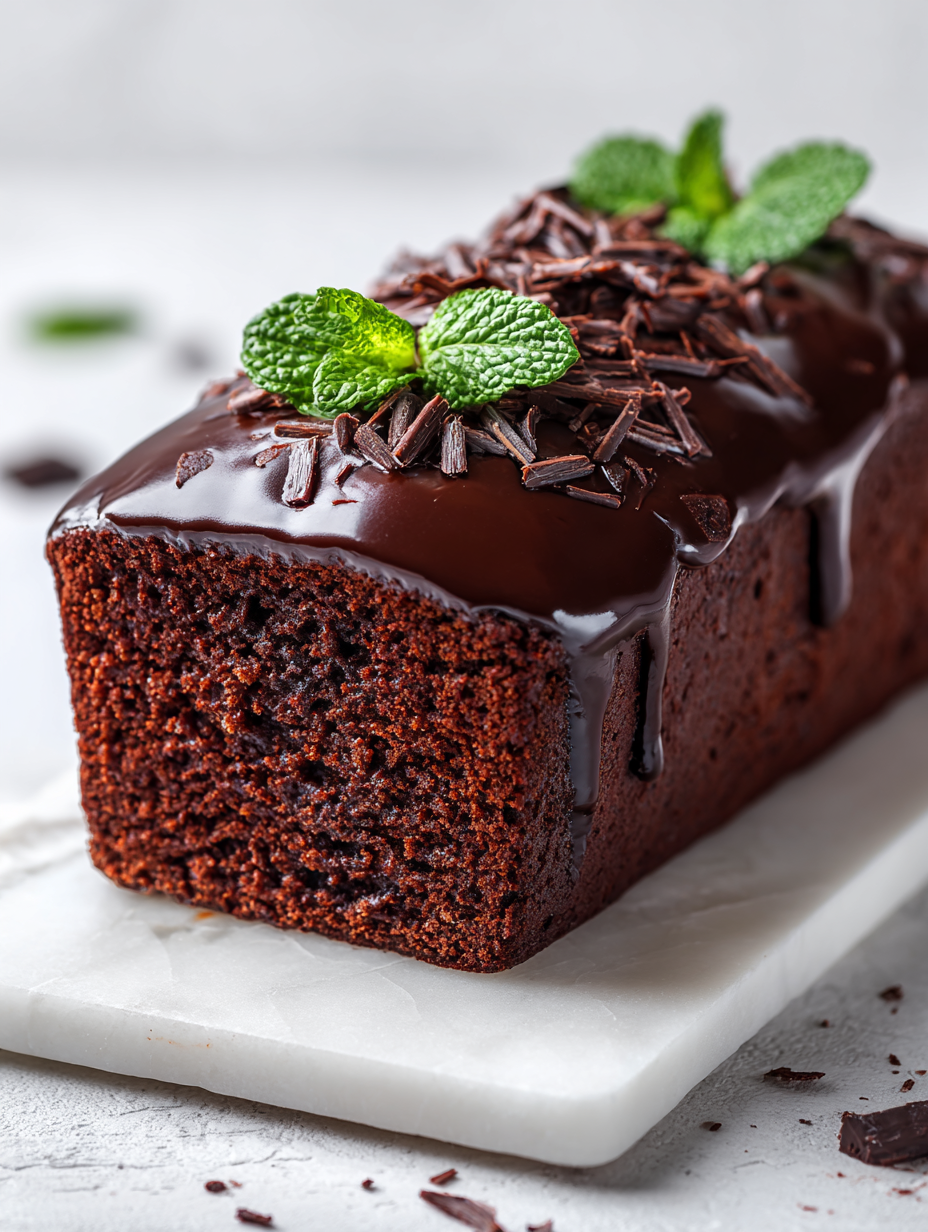
- Cake surface is deep glossy brown and slightly crackled.
- Toothpick inserted in center comes out moist but not wet.
- Cake feels firm but springs back when gently pressed.
Chocolate Pound Cake
Ingredients
Equipment
Method
- Preheat your oven to 175°C (350°F). Grease a 9×5 inch loaf pan thoroughly with butter and dust with cocoa powder to prevent sticking.
- In a large bowl, sift together the flour, cocoa powder, and baking powder. Set aside to ensure an even, lump-free dry mixture.
- Using a mixer, beat the softened butter and sugar on medium speed until the mixture is pale, fluffy, and aromatic—about 3-4 minutes. You should see it turn a lighter shade and feel soft to the touch.
- One at a time, add the eggs to the creamed mixture, beating well after each addition. Then, mix in the vanilla extract until the batter is smooth and cohesive.
- Gradually add the dry ingredients to the wet mixture in three parts, alternating with a splash of hot water or espresso. Mix gently on low speed just until everything is combined—be careful not to overmix to keep the crumb tender.
- Pour the batter into the prepared loaf pan, smoothing the top with a spatula. Tap the pan gently on the counter to release any air bubbles and even out the surface.
- Bake in the oven for 55 to 60 minutes. The cake is ready when the top is glossy and crackled, and a toothpick inserted into the center comes out with moist crumbs. The edges might pull slightly away from the pan.
- Remove the cake from the oven and let it cool in the pan for about 15 minutes. Then, transfer it to a wire rack and cool completely before slicing to allow the crumb to set properly.
- Once cooled, slice the cake with a sharp knife and serve. For an extra touch, dust lightly with cocoa powder or drizzle with melted chocolate if desired.
Pro tips for perfect chocolate pound cake
- Sift your cocoa and flour together to avoid lumps and ensure an even crumb.
- Cream the butter and sugar until light and fluffy—this develops the cake’s tender structure.
- Use room temperature eggs to help them incorporate smoothly into the batter.
- Gently fold dry ingredients into the wet to keep the batter airy and prevent toughness.
- Bake until the top feels firm and a toothpick comes out with moist crumbs—don’t overbake.
- Cool the cake completely before slicing to prevent crumbling and to set its structure.
- For extra richness, add a splash of brewed espresso to deepen the chocolate flavor.
Common mistakes and how to fix them
- FLOUR: DUMPED in all at once → Sift and fold gently to avoid dense texture.
- OVERTURNED the cake → Use the toothpick test; if moist crumbs cling, it’s not done.
- MISSED the oven temperature → Check with an oven thermometer; hot spots can cause uneven baking.
- DIDN’T cool completely → Rest at least 30 minutes before slicing to prevent crumbling.
Quick fixes and pantry swaps
- When batter appears lumpy, splash in a little hot water and whisk briskly.
- If cake cracks on top, patch with a drizzle of warm chocolate glaze.
- DUMPED in all ingredients too fast? Fold gently to avoid dense texture.
- When cake is over-torched, shield edges with foil for a softer crust.
- Splash a few drops of vanilla extract on slightly dry slices for extra moisture and aroma.
Prep, store, and reheat tips
- Prepare the batter a day in advance, then cover and refrigerate; the flavors meld and deepen overnight, making the final bake more complex.
- Wrap the cooled cake tightly in plastic wrap or store in an airtight container; it stays moist for up to 3 days at room temperature, with a rich chocolate aroma lingering.
- For longer storage, freeze slices or the whole cake for up to 1 month; wrap well to prevent freezer burn, preserving the deep cocoa scent.
- Reheat slices gently in the microwave for 10-15 seconds until warm; the chocolate intensifies, and the texture remains tender and just melts in your mouth.
- Allow refrigerated or frozen cake to come to room temp before serving; the flavors soften and the chocolate aroma becomes more pronounced, with a silky crumb.
Top questions about chocolate pound cake
1. Can I use lower-quality cocoa powder?
Use high-quality cocoa for a richer, more chocolatey flavor. It makes a noticeable difference in aroma and depth.
2. How do I know when the cake is done?
Bake the cake until a toothpick inserted in the center comes out with moist crumbs, not wet batter.
3. Should I use cold eggs straight from the fridge?
Room temperature eggs blend more smoothly, resulting in a tender crumb and even rise.
4. Can I make this recipe dairy-free?
Yes, you can substitute butter with melted coconut oil for a dairy-free version, but expect a slight flavor change.
5. How should I store leftover cake?
Wrap the cooled cake tightly in plastic wrap or store in an airtight container to keep it moist for several days.
6. What can I add to boost the chocolate taste?
Adding a splash of brewed espresso enhances the chocolate flavor, making it more intense and aromatic.
7. Should I let the cake cool before slicing?
Allow the cake to cool completely before slicing to prevent crumbling and ensure clean cuts.
8. Can I freeze this cake?
You can freeze the cake wrapped tightly for up to a month. Thaw at room temperature for best flavor.
9. Dutch-processed vs. natural cocoa, which is better?
Using Dutch-processed cocoa creates a smoother, mellower chocolate flavor. Natural cocoa gives a brighter, tangier note.
10. How do I avoid overmixing the batter?
Overmixing the batter can make the cake dense. Mix just until ingredients are combined to keep it tender.
Baking this chocolate pound cake fills my kitchen with a deep, cocoa aroma that’s both comforting and invigorating. It’s a simple pleasure, but one that reminds me why I love honest, unpretentious baking—where the focus is on flavor and the small details that make every slice special.
Sharing it with friends or slipping a warm slice into a quiet moment feels like passing along a quiet piece of joy. In times when sweetness feels just right, this cake offers a little reminder that good, straightforward baking never goes out of style.

Hi, I’m Charlotte Hayes, the creator and storyteller behind Lost in the Aroma. If you’ve ever closed your eyes while something simmered on the stove just to take in the scent, then you already understand what this space is about. For me, aroma is memory. It is emotion. It is the first sign that something beautiful is about to be shared. Lost in the Aroma is where I bring together recipes, sensory storytelling, and my lifelong love for food. I am so glad you’re here.


Leave a Reply