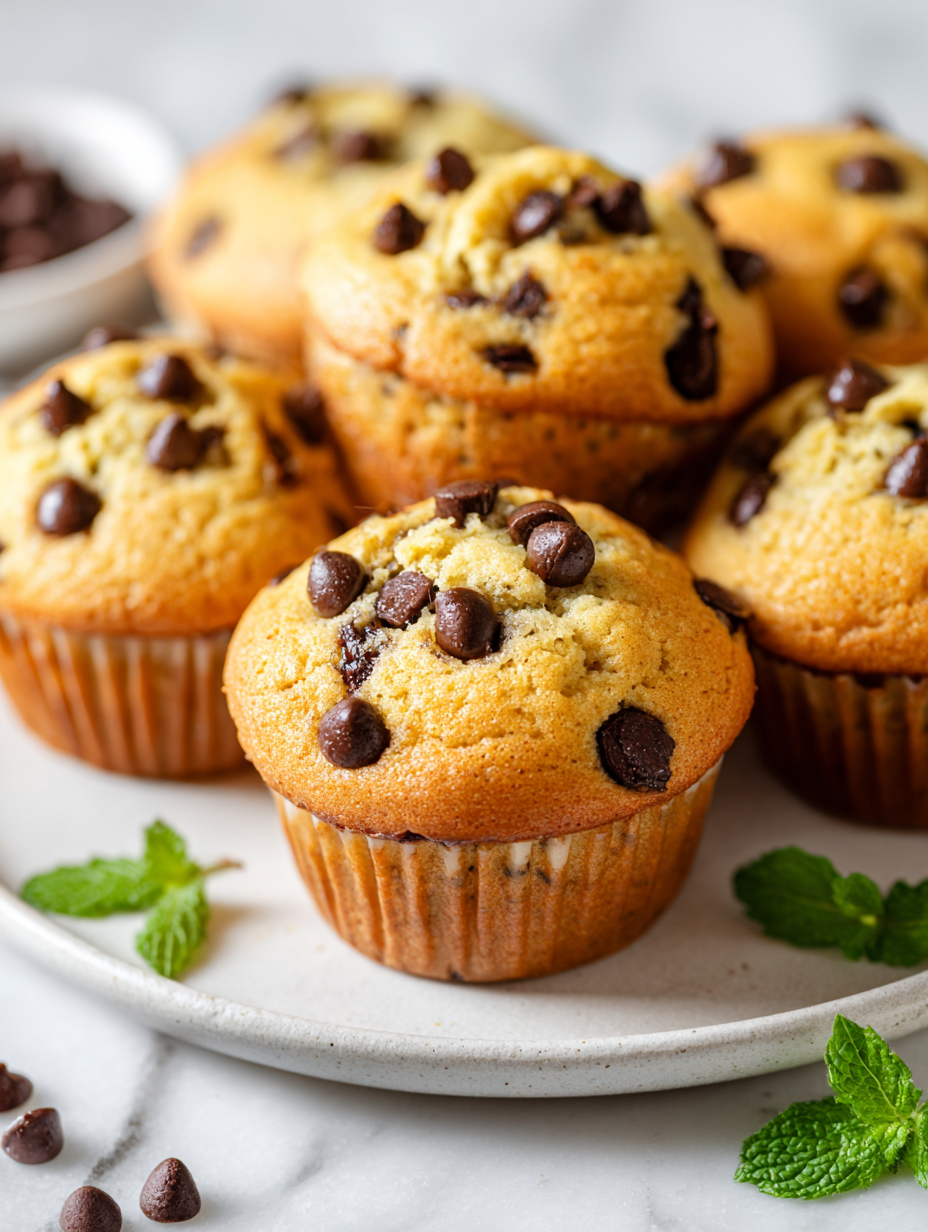
There’s something about waking up to the smell of warm muffins that instantly takes me back to childhood mornings. It’s that simple joy of a soft, crumbly treat packed with melty chocolate chips, just waiting to be sliced open. These muffins aren’t fancy, but they’re honest and comforting, perfect for when you need a little nostalgic boost to start your day.
What I love most is how forgiving this recipe is—no fancy tools or hard-to-find ingredients. Just a bowl, a spoon, and a handful of chocolate chips, and you’re good to go. It’s a reminder that sometimes, the best things come from the simplest ingredients, turned into something unexpectedly special.
Baking these feels like a small act of kindness—an easy way to bring a little warmth to someone’s morning, or even just your own. They’re perfect for lazy weekends or hurried weekday mornings when you want something sweet, but not complicated. And honestly, they taste just like those muffins my mom used to make on Saturday mornings, with a slightly crispy edge and gooey chocolate inside.
Focusing on the nostalgic comfort of childhood mornings, this recipe emphasizes using simple, everyday ingredients and techniques to create muffins that taste like a warm hug from the past.
Nostalgia in Every Bite
- Baking these muffins always takes me back to lazy Sunday mornings with my grandma’s kitchen filled with the smell of melting chocolate and warm batter.
- There’s a quiet pride in pulling a batch from the oven and seeing those perfect, slightly cracked tops—like little crowns of comfort.
- Sometimes, I make these for friends and watch their faces light up when they get that first gooey chocolate bite—never gets old.
- This recipe reminds me that the simplest pleasures—like a soft muffin and melty chips—are often the most satisfying.
- I love how these muffins can turn a rushed breakfast into a small, sweet moment of joy that sticks with you all day.
The story behind this recipe
- Making these muffins brings me back to my childhood kitchen, where my mom would toss chocolate chips into batter with a grin. It’s those small, messy moments—spoons dripping with batter, flour dusted on the counter—that remind me how baking is about joy, not perfection. I started tweaking her classic recipe when I wanted something richer, a little more indulgent, but still simple enough for a weekday treat.
- Every batch feels like a tiny rebellion—breaking the rules just enough to make something uniquely yours. The smell of melting chocolate and warm baked batter filling the house is a small, sweet victory. I keep coming back to this recipe because it’s forgiving, honest, and always tastes like a quiet celebration.
- heading: ‘The story behind this recipe’
Historical Tidbits About Chocolate Chip Muffins
- Chocolate chip muffins gained popularity in the US during the mid-20th century, coinciding with the rise of convenience baking.
- This recipe is inspired by classic American breakfast treats, blending simplicity with indulgence—perfect for busy mornings.
- Many bakeries claim to have created the first chocolate chip muffin, but it’s likely an evolution of chocolate chip cookies turned into a handheld breakfast.
Key Ingredients and Tips
- All-purpose flour: I prefer a slightly heaping cup for a tender crumb, but you can reduce it for a denser muffin if you like. The flour’s neutral flavor lets the chocolate shine.
- Granulated sugar: I use regular sugar, but brown sugar adds a richer, caramel note—try swapping half for brown if you want a deeper sweetness.
- Baking powder: This is your leavening hero—makes the muffins rise and stay fluffy. Don’t skip or use old powder; they can turn dense.
- Eggs: Large eggs bring structure and moisture. If you’re out, a flaxseed substitute works but changes the texture slightly—more crumbly.
- Butter: Unsalted, melted just enough to be smooth and shiny. It gives the muffins that tender, buttery mouthfeel—no margarine, please. If you want dairy-free, coconut oil works but the flavor shifts subtly.
- Chocolate chips: I love semi-sweet, but milk chocolate melts into gooey pockets, and dark offers a more intense chocolate punch. Toss them in flour first so they don’t sink.
- Milk: Whole milk keeps the batter moist and rich, but if you’re out, almond or oat milk can stand in—just don’t skip the added fat for tenderness.
Spotlight on Key Ingredients
Chocolate Chips:
- I love semi-sweet for their balanced sweetness and rich cocoa flavor. They melt into gooey pockets, tempting with each bite.
- Chocolate chips behave differently depending on their type—milk chips melt faster, creating luscious pockets, while dark chips stay firmer, offering bursts of intense flavor.
Butter:
- Unsalted, melted just until smooth and shiny. It provides a tender crumb and that comforting buttery aroma during baking.
- Butter’s behavior is crucial—overheating can make it greasy, under-melting can affect texture. Use fresh, high-quality butter for the best flavor.
Notes for ingredient swaps
- Dairy-Free: Swap regular butter with coconut oil or dairy-free margarine. Keeps the muffins moist, but may slightly alter richness.
- Egg-Free: Use mashed banana or applesauce as an binder. Expect a denser crumb and a hint of fruity flavor.
- Sugar Alternatives: Replace granulated sugar with honey or maple syrup. Adjust the liquid content slightly for best texture.
- Flour Options: Whole wheat or spelt flour can replace all or part of the all-purpose flour. Adds a nuttier flavor and denser crumb.
- Chocolate Chips: Use chopped dark chocolate or white chocolate chunks for different flavor profiles. Adjust sweetness accordingly.
- Milk Variants: Almond, oat, or soy milk can substitute regular milk. Slightly change moisture content, but should work fine.
- Flavor Boost: Add a pinch of cinnamon or vanilla extract to the batter. Enhances overall flavor without extra effort.
Equipment & Tools
- Muffin tin: Holds the batter and shapes the muffins.
- Mixing bowls: Combine wet and dry ingredients separately.
- Whisk or spoon: Stir ingredients together gently.
- Measuring cups and spoons: Ensure accurate ingredient quantities.
- Cooling rack: Cool muffins evenly and prevent sogginess.
Step-by-step guide to muffins
- Preheat your oven to 180°C (350°F). Grease a muffin tin or line with paper liners—don’t skip this, or you’ll wrestle with sticking muffins.
- In a large bowl, whisk together 1 ½ cups of all-purpose flour, ½ cup of granulated sugar, and 2 teaspoons of baking powder. Feel free to add a pinch of salt if your butter is unsalted—just a quick stir and you’re set.
- In a separate bowl, beat 2 large eggs with ½ cup of melted unsalted butter, and ½ cup of milk until combined. The smell should be rich, a little sweet, with a hint of buttery warmth.
- Pour the wet ingredients into the dry, and fold gently—don’t overmix. Stop when just combined; a few lumps are okay, they keep the muffins tender.
- Toss in ¾ cup of chocolate chips, coating them lightly with a spoon of flour first—this prevents sinking. Fold in just enough to distribute evenly.
- Spoon the batter into your prepared muffin tin, filling each cup about ¾ full. Tap the tray lightly on the counter to settle the batter and release air bubbles.
- Bake for 20-22 minutes. The tops should turn golden brown, and the kitchen will fill with that irresistible chocolate and butter aroma. The edges might crack slightly—perfectly normal.
- Check for doneness by inserting a toothpick into the center of a muffin. It should come out clean or with a few moist crumbs—not wet batter. If not, bake for another 2-3 minutes, watching the color.
- Remove from oven and let the muffins rest in the tin for 5 minutes—this helps them set. Then transfer to a wire rack to cool slightly. They’re best warm, with gooey chocolate pockets melting on your tongue.
- For a crispy top, give the muffins a quick broil for 30 seconds—watch closely so they don’t burn. Otherwise, serve as is, with a sprinkle of sea salt if you’re feeling fancy.
Let the muffins rest for 5 minutes in the tin, then transfer to a wire rack. Serve warm or at room temperature, perhaps with a pat of butter. Enjoy the slightly crispy tops and gooey chocolate centers—the best part.
How to Know It’s Done
- Golden brown tops with slightly cracked edges.
- Toothpick inserted in center comes out clean or with moist crumbs.
- Smell of melted chocolate and warm butter fills the kitchen.
Chocolate Chip Muffins
Ingredients
Equipment
Method
- Preheat your oven to 180°C (350°F) and line a muffin tin with paper liners or lightly grease each cup.
- In a large mixing bowl, whisk together the flour, sugar, and baking powder until evenly combined. This creates a light, airy base for your muffins.
- In a separate bowl, beat the eggs with a whisk or fork until they’re slightly frothy, then stir in the melted butter and milk until the mixture is smooth and fragrant.
- Pour the wet mixture into the dry ingredients, then gently fold them together with a spoon or spatula. Stop mixing as soon as just combined; a few lumps are fine—overmixing can make the muffins dense.
- Sprinkle the chocolate chips over the batter and fold them in lightly, coating the chips with a bit of flour to prevent sinking.
- Spoon the batter into the prepared muffin cups, filling each about ¾ full. Give the tray a gentle tap on the counter to settle the batter and release any air bubbles.
- Bake in the preheated oven for 20-22 minutes, until the tops are golden and a toothpick inserted into the center comes out clean. The muffins will smell sweet and chocolatey as they bake.
- Remove the muffins from the oven and let them rest in the tin for about 5 minutes, then transfer them to a wire rack to cool slightly. The tops should be slightly cracked and crispy, with a soft, moist crumb inside.
- Serve the muffins warm or at room temperature. For an extra touch, add a sprinkle of sea salt or a drizzle of chocolate for added indulgence.
Notes
Pro tips for perfect muffins
- & Cold: Chill your flour slightly to prevent over-activation of baking powder, keeping muffins tender.
- Gentle & Quick: Fold the batter just until combined to avoid tough muffins from overmixing.
- Sweet & Melty: Toss chocolate chips in a little flour before adding to keep them suspended and prevent sinking.
- Warm & Aromatic: Melt butter until just shiny, not greasy, for a rich, tender crumb with a subtle aroma.
- Color & Sniff: Watch for a golden top and fragrant chocolate-butter smell—signs your muffins are perfectly baked.
- Cool & Rest: Let baked muffins sit for 5 minutes before transferring—this helps set the structure and prevents crumbling.
- Crisp & Soft: For a crispy top, broil for 30 seconds at the end—keep a close eye so they don’t burn.
Common mistakes and how to fix them
- FORGOT to check oven temperature → calibrate oven for even baking.
- DUMPED in all flour at once → sift and fold gently to avoid dense muffins.
- OVER-TORCHED the muffins → lower oven temp by 10°C (20°F) and watch closely.
- UNDERESTIMATED mixing time → mix until just combined, don’t overwork batter.
Quick Fixes and Pantry Swaps
- If muffins turn out dense, fold the batter less vigorously to keep them airy.
- When chocolate chips sink, toss them in a little flour before mixing.
- Splash a few drops of water on the oven floor if muffins over-brown quickly.
- Patch cracked tops with a tiny dab of batter before baking for a smooth finish.
- Shield muffins with foil if edges brown too fast, preserving moisture inside.
Prep, store, and reheat tips
- Prepare the dry ingredients—whisk the flour, sugar, and baking powder—up to a day ahead, then store in an airtight container. The dry mix keeps the flour from clumping and saves time in the morning.
- Mix the wet ingredients and fold in the chocolate chips just before baking. You can do this step a few hours ahead and keep the batter covered in the fridge; it may thicken slightly but remains workable.
- Baked muffins are best enjoyed warm, but can be stored in an airtight container at room temperature for up to 24 hours. They stay soft with a slightly chewy crust, and the chocolate stays gooey if eaten within a day.
- To reheat, warm muffins in a 180°C (350°F) oven for 5-7 minutes or microwave for 20-30 seconds. The smell of melted chocolate and buttery warmth will revive instantly, making them feel fresh.
- You can freeze baked muffins in a sealed bag for up to 2 months. To serve, thaw at room temperature or reheat briefly. The texture remains tender, with the chocolate pockets still gooey if reheated properly.
Top questions about chocolate chip muffins
1. How do I know when the muffins are done?
Look for muffins that are golden on top with a slight crackle—these signs show they’re baked through. The smell should be rich and chocolatey, inviting you in for the first bite.
2. How can I tell if they’re fully baked?
Insert a toothpick into the center; it should come out clean or with moist crumbs—not wet batter. If not, bake for another minute or two, watching the color and aroma.
3. Can I use different types of chocolate chips?
Use semi-sweet chocolate chips for a balanced flavor—milk chocolate melts into pockets, dark chocolate adds intensity. Toss them in a little flour to prevent sinking to the bottom.
4. Can I make these dairy-free?
Yes, you can substitute dairy-free margarine or coconut oil for butter, but your muffins might be slightly less tender and have a different flavor profile. Adjust the fat accordingly.
5. What if I don’t have eggs?
Absolutely. You can replace eggs with mashed bananas or applesauce, but expect a denser crumb and a hint of fruity flavor. It works best if you’re out of eggs or need a vegan option.
6. How do I avoid tough muffins?
Overmixing can make muffins dense. Mix until just combined—lumps are okay. Overworking the batter develops gluten, leading to tougher muffins.
7. How can I get a crispy top?
For a crisp top, give the muffins a quick broil for 30 seconds at the end—closely watch to prevent burning. Otherwise, serve warm for maximum gooeyness.
8. Can I make the batter in advance?
Prepare the dry mix ahead of time and store in an airtight container. Reassemble with wet ingredients just before baking to save time in the morning.
9. How should I store leftovers?
Store baked muffins in an airtight container at room temperature for up to 24 hours. For longer storage, freeze them and reheat in the oven or microwave, until the chocolate melts and they smell warm.
10. Why do my muffins sink in the middle?
If muffins sink in the middle, toss the chocolate chips in flour before adding to the batter. This helps suspend them and prevents sinking, ensuring chocolate in every bite.
Baking these muffins is a way to reconnect with simple pleasures—warm, chocolate-studded bites that remind me of childhood mornings. Each batch feels like a small, honest act of kindness, filling the house with the smell of melted chocolate and buttery warmth.
In the end, these muffins aren’t just about taste—they’re about comfort, nostalgia, and a little bit of chaos in the best way. They’re perfect for quiet mornings or messy weekends when you need a sweet, no-fuss treat that brings a little joy to the day.

Hi, I’m Charlotte Hayes, the creator and storyteller behind Lost in the Aroma. If you’ve ever closed your eyes while something simmered on the stove just to take in the scent, then you already understand what this space is about. For me, aroma is memory. It is emotion. It is the first sign that something beautiful is about to be shared. Lost in the Aroma is where I bring together recipes, sensory storytelling, and my lifelong love for food. I am so glad you’re here.


Leave a Reply