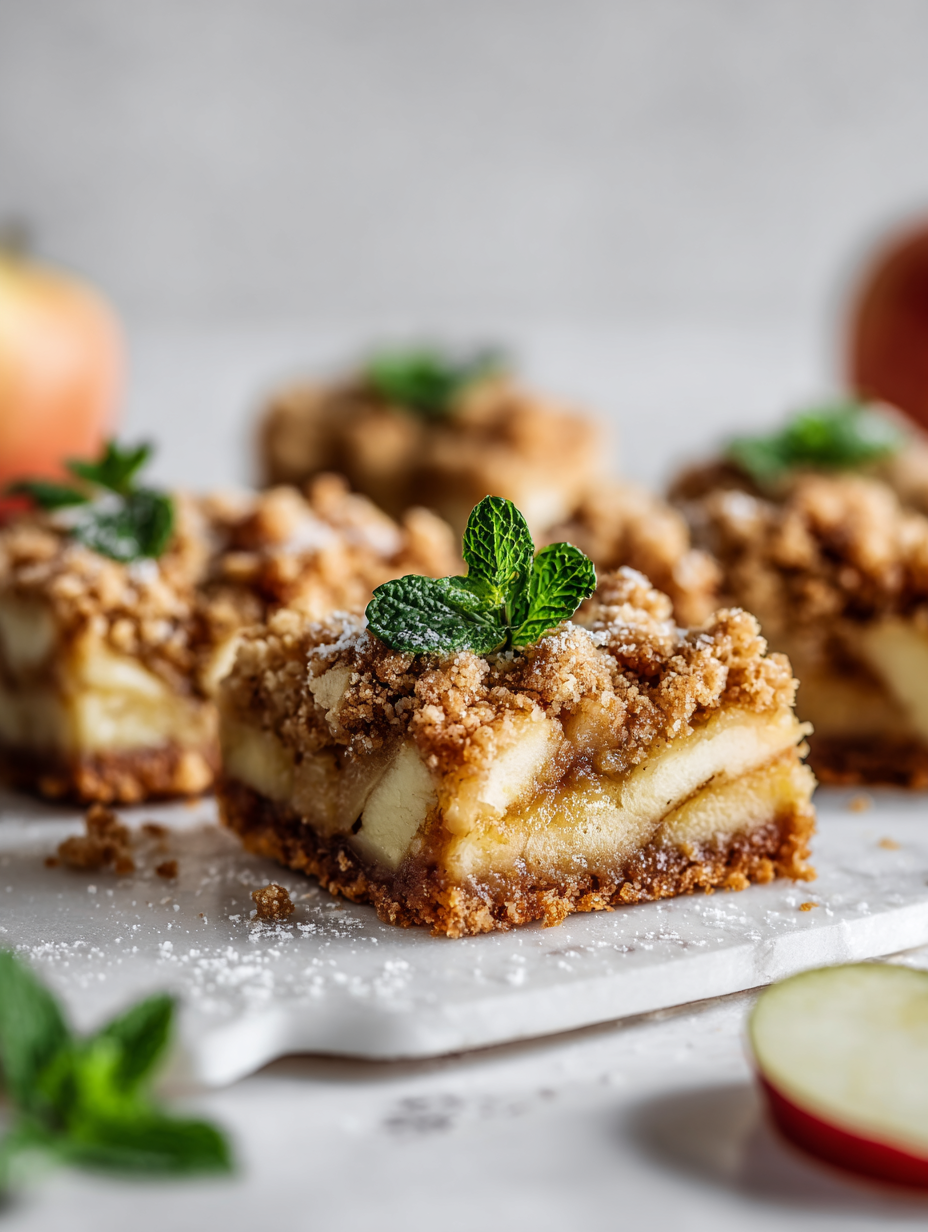
These apple crumble bars are my go-to for those times when I want a taste of fall without the fuss of making a full apple pie. They’re portable, easy to pack, and somehow manage to carry that warm, spiced apple scent in every bite, even when you’re on the go. It’s like having a little piece of cozy, homemade dessert that you can slip into your bag or grab for a quick snack at work.
What I love most is how they bring back childhood memories—crisp mornings, the smell of apples baking, and the crunch of a buttery crust. But instead of fussing with a pie crust, I’ve simplified everything into bars that keep the essence of that nostalgic treat intact. They’re perfect for picnics, lunchboxes, or whenever you need a sweet escape that’s just as fast to make as it is satisfying.
Focusing on how these bars can serve as a portable, nostalgic treat that captures the essence of homemade apple pie in a convenient, snackable form.
The story behind this recipe
I first stumbled upon a batch of these bars at a cozy fall bake sale, and the smell of cinnamon and baked apples pulled me right in. Ever since, they’ve been my go-to treat when I want something warm and familiar but with a little twist of portability. It’s funny how a simple idea—turning apple pie into bars—can turn into my favorite way to use up extra apples and satisfy that craving without turning on the oven for hours. Every bite reminds me of hurried mornings and lazy afternoons, all wrapped into one portable, crumbly package.
Key ingredients and tips
- Apples: I prefer a tart variety like Granny Smith for a bright, zesty flavor that cuts through the sweetness, but Honeycrisp works well if you want a milder, juicier bite.
- Brown Sugar: I love how it adds a deep caramel note and sticky richness to the crumble, but coconut sugar can be a good swap for a slightly nuttier flavor.
- Butter: Use cold, cubed butter for a flaky, crumbly texture; melted butter will make the crust denser—trust me, that’s not what you want here.
- Oats: Old-fashioned rolled oats give a hearty crunch, but if you only have quick oats, give them a quick pulse in the food processor to mimic texture.
- Cinnamon: The smell of cinnamon blooming in the oven is my favorite part—don’t skip it! Nutmeg or allspice can add warmth if you like a spiced kick.
- Lemon Juice: Just a splash brightens everything and keeps the apples from browning—skip it if you’re out, but don’t skip that zing!
- Flour: I stick with all-purpose flour to bind the crumble topping; almond flour can work if you want a nuttier, gluten-free version, but it’s a bit denser.
Spotlight on key ingredients
Apples:
- I prefer tart Granny Smiths for a zesty bite that balances sweetness, but Honeycrisp adds juiciness and mellow flavor, so pick based on your taste.
- Brown Sugar: It lends a deep caramel richness to the crumble, but coconut sugar can be a decent swap if you’re after a nuttier undertone.
Oats:
- Butter: Cold, cubed butter is key for that flaky, crumbly topping; melted butter makes it denser and less tender—trust me, stick with cold.
- Old-fashioned rolled oats give the topping crunch, but if you’re out, pulse quick oats in the food processor to mimic that hearty texture.
Notes for ingredient swaps
- FLOUR: I stick with all-purpose for structure, but almond flour works if you’re gluten-free, though it makes the crumble denser.
- BUTTER: Cold, cubed butter gives the best flake; melted butter will make the topping more compact—trust me, it’s not as crumbly.
- SUGAR: Brown sugar adds a rich, caramel flavor, but coconut sugar offers a similar sweetness with a slightly nuttier taste.
- OATS: Old-fashioned rolled oats give crunch, but quick oats can be pulsed a few times to mimic texture if that’s all you’ve got.
- APples: Tart varieties like Granny Smith brighten the flavor, but Honeycrisp provides juiciness and a milder sweetness, so choose based on your preference.
- LEMON JUICE: Brightens the apples and prevents browning; if you’re out, a splash of vinegar can add a similar zing.
- CINNAMON: Essential for that warm aroma—if you don’t have cinnamon, a pinch of ground nutmeg or allspice can add cozy spice notes.
Equipment & Tools
- 9-inch square baking pan: Holds the assembled bars for baking evenly.
- Mixing bowls: Combine ingredients for topping and filling separately.
- Pastry cutter or fingers: Work butter into dry ingredients to create crumble topping.
- Peeler and knife: Prepare apples uniformly for even baking.
- Skewer or toothpick: Test for doneness in the apple filling.
Step-by-step guide to apple crumble bars
- Preheat your oven to 180°C (350°F). Grease a 9-inch square baking pan or line it with parchment paper for easy removal.
- Prepare the apples: peel, core, and dice about 3-4 medium apples into small, even chunks. Toss with a teaspoon of lemon juice to prevent browning and set aside.
- Make the crumble topping: In a mixing bowl, combine 1 cup rolled oats, 1/2 cup brown sugar, 1/2 teaspoon cinnamon, and 1/4 teaspoon salt. Add 1/2 cup cold, cubed butter. Use your fingers or a pastry cutter to work the butter into the dry ingredients until crumbly with pea-sized bits. Set aside.
- Prepare the apple layer: In a large bowl, toss the diced apples with 1 tablespoon flour, 1 teaspoon cinnamon, and a pinch of salt. Spread this mixture evenly in the prepared baking pan.
- Assemble the bars: Sprinkle the crumble mixture evenly over the apples, pressing lightly to adhere in some spots, but don’t pack it down. It should look generously layered.
- Bake for 35-40 minutes. The topping should turn golden brown, and the apples should be bubbling at the edges. The smell will be warm cinnamon and baked apples.
- Check for doneness: The top should be crisp, and a skewer inserted in the center should come out with moist crumbs, not wet batter. If the topping is browning too quickly, tent with foil.
- Remove from oven and let cool in the pan for at least 15 minutes. This helps the filling set, making slicing easier and cleaner.
- Once cooled slightly, cut into squares. Serve warm or at room temperature, perhaps with a dollop of vanilla yogurt or a drizzle of caramel if desired.
Let the bars cool in the pan for 15 minutes to set. Then, cut into squares with a sharp knife. Serve warm or at room temperature, perhaps with a dollop of cream or a sprinkle of powdered sugar for extra indulgence.
How to Know It’s Done
- Golden, crisp topping with no raw flour patches.
- Apple filling bubbling and tender when pierced with a skewer.
- Edges slightly caramelized and fragrant with cinnamon.
Apple Crumble Bars
Ingredients
Equipment
Method
- Preheat your oven to 180°C (350°F) and lightly grease or line your 9-inch square pan with parchment paper.
- Peel, core, and dice the apples into small, even chunks. Toss them with a tablespoon of lemon juice to keep them bright and prevent browning. Spread the apples evenly in the prepared pan.
- In a mixing bowl, combine the rolled oats, brown sugar, cinnamon, salt, and flour. Mix well to distribute everything evenly.
- Add the cold, cubed butter to the dry mixture. Use your fingers or a pastry cutter to work the butter into the mixture until it resembles coarse crumbs with pea-sized bits. This creates the crumbly topping.
- Sprinkle the crumble evenly over the apples in the pan, pressing lightly with your fingers to help it stick and form a layered topping.
- Bake in the preheated oven for 35-40 minutes, until the topping turns golden brown and the apple filling is bubbling at the edges. The house will fill with warm cinnamon and baked apple aroma.
- Remove the pan from the oven and let it cool for at least 15 minutes. This helps the filling set and makes slicing easier.
- Use a sharp knife dipped in hot water to cut the bars into squares. Serve warm or at room temperature, perhaps with a dollop of yogurt or a drizzle of caramel for added indulgence.
Notes
Pro tips for perfect apple crumble bars
- Use cold butter for a flaky crumble that holds together during baking.
- Toast oats lightly before mixing to enhance nutty flavor and crunch.
- Sprinkle crumble evenly and gently press it onto the apples for a uniform topping.
- Check the bake with a skewer; it should come out moist but not raw.
- Let the bars cool for at least 15 minutes; this helps set the filling and makes slicing cleaner.
- For extra flavor, add a pinch of ground ginger or nutmeg to the crumble mix.
- Use a sharp knife dipped in hot water for clean, smooth cuts through the dense crumble.
Common mistakes and how to fix them
- FORGOT to check oven temperature → Use an oven thermometer for accuracy.
- DUMPED all the crumble topping → Sprinkle evenly, don’t pack it down.
- OVER-TORCHED the edges → Tent with foil to prevent burning.
- MISSED the apple juice splash → Brightens and prevents browning, don’t skip it.
Quick fixes and pantry swaps
- When the topping looks uneven, sprinkle again and gently press for even crispiness.
- If the bars are too crumbly, add a splash of milk or apple juice to the crumble mix.
- Splash a little lemon juice on apples when peeling to prevent browning and keep that fresh look.
- Patch a cracked crust with extra crumble mixture—preferably in hidden spots, so no one notices.
- Shield the edges with foil if they brown too quickly during baking to avoid burnt bits.
Prep, store, and reheat tips
- Prepare the apple filling and crumble topping ahead of time; store separately in airtight containers for up to 2 days in the fridge, keeping the crispy texture intact.
- Assemble the bars up to 24 hours before baking; cover tightly and refrigerate to allow flavors to meld without compromising the crumbly topping.
- Baked bars can be stored in an airtight container at room temperature for 2 days or in the fridge for up to a week. Reheat in a 180°C (350°F) oven until warm, about 10 minutes, until the edges shimmer slightly and the aroma rekindles.
- For longer storage, freeze the bars wrapped tightly in plastic wrap and foil for up to 3 months. Thaw at room temperature, then reheat in the oven for a crisp finish, checking for that golden glow and bubbly filling.
Common Questions about Apple Crumble Bars
1. Can I use different apples?
Use tart apples like Granny Smith for a bright flavor that balances sweetness. They hold up well during baking and add a zesty punch.
2. Can I make these gluten-free?
Yes, you can substitute gluten-free flour or almond flour, but the texture may be slightly denser. Adjust the quantity if needed to match the consistency.
3. How do I know when they’re baked?
Keep an eye on the edges; if they brown too fast, tent with foil. The bars are done when the topping is golden and bubbling around the edges.
4. How should I store leftovers?
Store the bars in an airtight container at room temperature for 2 days or in the fridge for up to a week. Reheat in the oven until warm, about 10 minutes at 180°C (350°F).
5. Can I freeze them?
Yes, these bars freeze well for up to 3 months. Wrap tightly in plastic and foil, then thaw at room temperature before reheating.
6. How do I get an even topping?
To prevent uneven baking, spread the crumble topping evenly and press lightly onto the apples. Use a skewer to test the filling for tenderness.
7. Any flavor add-ins or tweaks?
To enhance flavor, toast the oats before mixing or add a pinch of ground ginger for extra warmth. These small tweaks boost aroma and texture.
8. Can I use melted butter?
Use cold, cubed butter for a flaky, crumbly topping. If melted, the topping turns dense—trust me, it’s not as crisp.
9. How should I prepare the apples?
Peeling and chopping apples into small, even pieces ensures they cook through evenly and release their juices nicely during baking.
10. What if the topping burns?
Yes, if the topping gets too dark, tent with foil. Always check the oven temperature with a thermometer for best results.
These apple crumble bars carry a bit of my own kitchen chaos—crisp, sticky, and just a little forgiving. They’re perfect for those days when I want something sweet, portable, and full of memories of fall mornings. Sometimes, the best recipes are the ones that remind us of home, even in the busiest moments. They’re easy to toss together, but the flavor sticks around long after the last crumb.
Whenever I cut into one, I remember why I love baking—simple ingredients, honest textures, and that warm apple scent filling the room. No matter how many you make, they vanish quick, leaving behind a little bit of comfort in every bite. That’s what keeps me reaching for my mixing spoon, again and again.

Hi, I’m Charlotte Hayes, the creator and storyteller behind Lost in the Aroma. If you’ve ever closed your eyes while something simmered on the stove just to take in the scent, then you already understand what this space is about. For me, aroma is memory. It is emotion. It is the first sign that something beautiful is about to be shared. Lost in the Aroma is where I bring together recipes, sensory storytelling, and my lifelong love for food. I am so glad you’re here.


Leave a Reply