Making bran muffins from scratch feels like reclaiming a slow Sunday morning, even when life’s rushing around. There’s something grounding about mixing up the batter, hearing the oats and bran crackle together, and knowing these muffins will warm up the house and my hands. It’s a little ritual that connects me to childhood mornings, when simple comfort was just a bake away.
On busy weekends, these muffins offer a quiet moment of satisfaction. The smell of toasted bran and cinnamon fills the kitchen, pulling me into a space of calm and familiarity. Baking them is less about perfection and more about creating a small, nourishing pause—something wholesome I can rely on to start the day right.
Focusing on how making bran muffins from scratch can be a grounding ritual, connecting me to childhood mornings and the simple joy of baking something wholesome with my own hands, especially on busy weekends when I crave comfort that’s both familiar and satisfying.
Nostalgic mornings in every bite
- Baking these muffins feels like a small act of rebellion against the chaos of mornings, a quiet moment I cherish.
- There’s a nostalgic thrill in waking up to the warm scent of toasted bran filling the house, grounding me in simple pleasures.
- Every batch reminds me of my grandmother’s kitchen, where the smell of baked goods was the first thing to greet the day.
- Making these from scratch is my way of slow-cooking my mornings, taking time to nourish body and soul.
Nostalgic mornings in every bite
- Making bran muffins from scratch became my Sunday ritual after a hectic week. There’s a quiet satisfaction in measuring out the oats, the crunch of bran as it hits the bowl, and the smell of cinnamon that seems to slow everything down. It’s a simple act, but it reconnects me to a time when breakfast was a comforting, unhurried moment.
- These muffins remind me of mornings at my grandma’s house, where she’d always have a batch ready to go, filling the kitchen with a warm, toasted aroma. Baking them now is my way of reclaiming that peaceful start, especially when life feels too busy or chaotic. It’s a small, honest pleasure that fuels my weekend mornings.
- heading: The story behind this recipe
Historical tidbits about bran muffins
- Bran muffins gained popularity during the early 20th century as a health food, thanks to their high fiber content.
- The inclusion of bran in baked goods was initially promoted for its digestive benefits, especially in the 1920s health movements.
- Many traditional recipes were shaped by resourcefulness, using leftover bran and oats to create hearty, economical breakfasts.
- In the 1950s, bran muffins became a staple in American households, often featured in diet and wellness magazines.
Ingredient breakdown: key components
- Whole wheat bran: I love the nutty, slightly smoky aroma it adds—make sure to toast it lightly for more flavor, or skip to keep it softer if you prefer a milder bite.
- Whole wheat flour: It gives these muffins a hearty texture—if you want lighter muffins, substitute half with unbleached all-purpose flour, but expect less fiber.
- Brown sugar: I prefer the rich caramel notes it brings—if you want a less sweet muffin, cut back a bit or use coconut sugar for a deeper flavor.
- Baking powder: It’s the leavening backbone—make sure it’s fresh, or muffins might turn out dense and flat instead of fluffy and crackly on top.
- Milk: I use whole milk for richness—substitute with almond or oat milk for a dairy-free version, but note the muffins might be slightly less tender.
- Vegetable oil: It keeps the muffins moist—try melted coconut oil for a subtle tropical note or applesauce for a lighter, oil-free version.
- Optional add-ins: Nuts, dried fruits, or even chocolate chips—these add texture and surprise bites, but keep the mix balanced so muffins don’t overflow.
Spotlight on key ingredients
Whole wheat bran:
- I love the nutty, slightly smoky aroma it adds—make sure to toast it lightly for more flavor, or skip to keep it softer if you prefer a milder bite.
- Whole wheat flour: It gives these muffins a hearty texture—if you want lighter muffins, substitute half with unbleached all-purpose flour, but expect less fiber.
Brown sugar & Baking powder:
- Brown sugar: I prefer the rich caramel notes it brings—if you want a less sweet muffin, cut back a bit or use coconut sugar for a deeper flavor.
- Baking powder: It’s the leavening backbone—make sure it’s fresh, or muffins might turn out dense and flat instead of fluffy and crackly on top.
Notes for ingredient swaps
- Dairy-Free: Swap milk for almond or oat milk. Expect a slightly lighter crumb, but still moist.
- Sweetener: Use honey or maple syrup instead of brown sugar. These bring a richer, more complex sweetness.
- Oil: Replace vegetable oil with melted coconut oil for a hint of tropical aroma, or applesauce for lighter muffins.
- Flour: Try spelt or oat flour for a nuttier flavor and a slightly denser texture, but adjust liquids accordingly.
- Add-ins: Nuts, dried fruits, or chocolate chips—feel free to mix according to your taste, but keep the batter balanced.
- Baking Powder: Ensure it’s fresh for proper rise; if you’re out, a pinch of baking soda with a splash of vinegar can work.
- Flavor Boost: Add a teaspoon of cinnamon or nutmeg for extra warmth; skip if you want a more neutral muffin.
Equipment & Tools
- Mixing bowl: To combine dry and wet ingredients easily.
- Whisk: To blend ingredients smoothly without lumps.
- Muffin tin: Holds the batter and shapes the muffins.
- Spatula: To fold ingredients and scrape batter from bowls.
- Toothpick: To test for doneness by checking the baked muffins’ interior.
Step-by-step guide to bran muffins
- Gather your equipment: a mixing bowl, a whisk, a muffin tin, and a spatula. Preheat your oven to 180°C (350°F).
- In the mixing bowl, combine 1 cup of whole wheat flour, 1 cup of toasted wheat bran, 1/2 cup of brown sugar, and 1 teaspoon of baking powder. Whisk together until evenly distributed.
- In a separate jug, beat together 2 large eggs, 3/4 cup of milk (dairy or plant-based), and 1/4 cup of vegetable oil. Add a teaspoon of vanilla if you like a hint of aroma.
- Pour the wet ingredients into the dry. Gently fold with a spatula until just combined. Do not overmix—lumps are okay, they keep the muffins tender.
- Divide the batter evenly among the muffin cups, about 3/4 full. Give each a gentle tap on the counter to settle the batter and release air pockets.
- Bake in the preheated oven for 18-20 minutes. The tops should turn a golden-brown, and a toothpick inserted into the center comes out clean.
- While baking, the kitchen will fill with the warm, toasty smell of bran and cinnamon—this is your cue that they’re nearing perfection.
- Once out of the oven, let the muffins rest in the tin for 5 minutes. Then transfer to a wire rack and cool slightly before serving for best texture and flavor.
Allow muffins to rest in the tin for 5 minutes, then transfer to a wire rack. Serve warm or at room temperature. Muffins are best enjoyed within the first day but keep in an airtight container for up to 2 days for best freshness.
How to Know It’s Done
- Golden-brown tops with slight crackle, indicating doneness.
- Toothpick inserted into the center comes out clean, with moist crumbs clinging.
- Muffins feel firm but springy when gently pressed, not too soft or too dense.
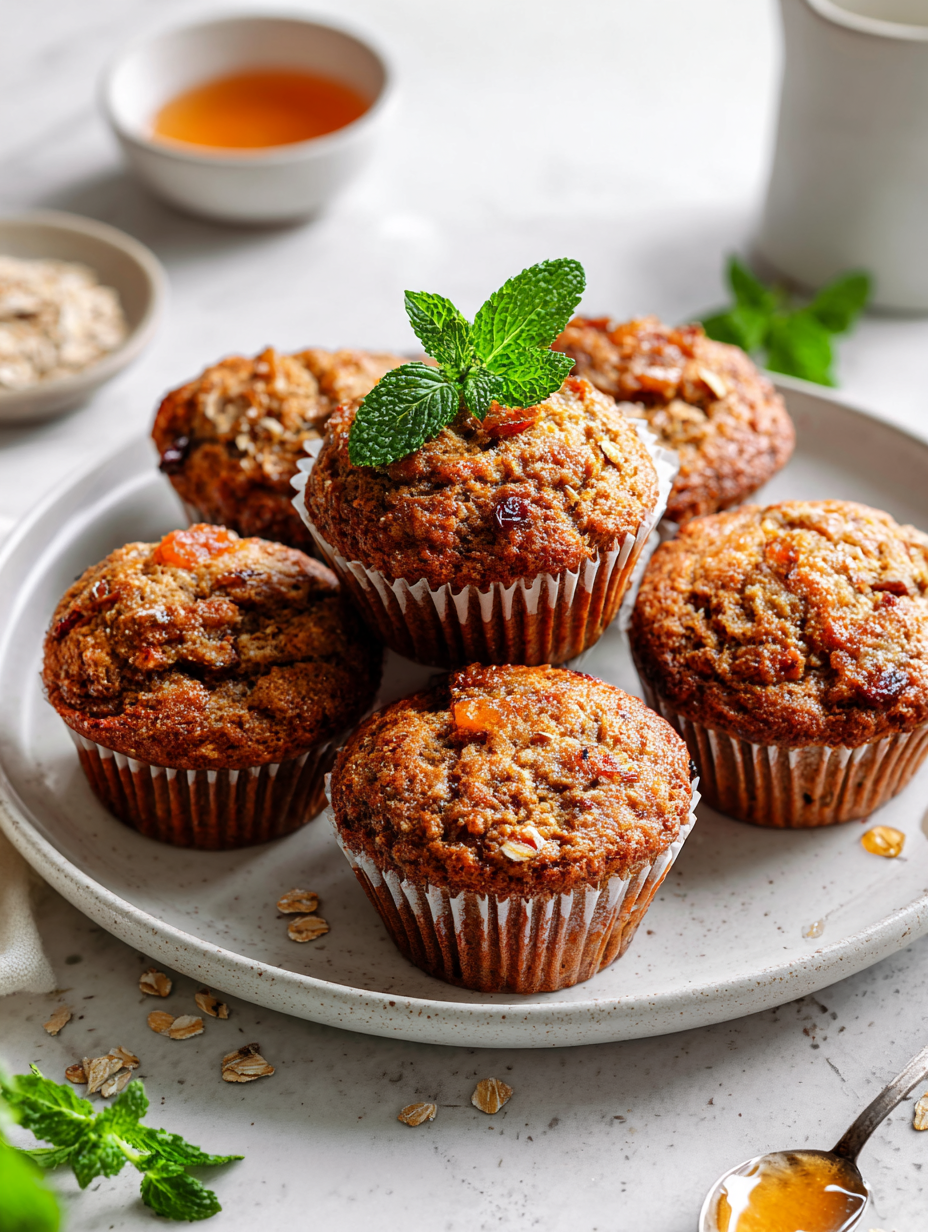
Homemade Bran Muffins
Ingredients
Equipment
Method
- Preheat your oven to 180°C (350°F) and line a muffin tin with paper liners or lightly grease it.
- In a large mixing bowl, whisk together the whole wheat flour, toasted wheat bran, brown sugar, and baking powder until well combined. You’ll see the dry ingredients become evenly distributed and slightly fluffy.
- In a separate bowl or jug, beat the eggs with the milk, vegetable oil, and vanilla extract until the mixture is smooth and slightly frothy, filling your kitchen with a sweet, warm aroma.
- Pour the wet mixture into the bowl with the dry ingredients and gently fold everything together with a spatula until just combined. It’s okay if the batter is a little lumpy—that keeps the muffins tender.
- Divide the batter evenly among the muffin cups, filling each about three-quarters full. Give the tray a gentle tap on the counter to smooth the tops and release any air bubbles trapped inside.
- Bake in the preheated oven for 18-20 minutes, until the tops are golden and a toothpick inserted into the center comes out clean. The muffins will develop a crackly, toasted crust and smell irresistibly warm.
- Remove the muffins from the oven and let them rest in the tin for about 5 minutes—this helps them set and makes removal easier.
- Transfer the muffins to a wire rack and let them cool slightly. They’re best enjoyed warm, with their moist crumb and fragrant aroma ready to satisfy your nostalgic mornings.
Pro tips for perfect bran muffins
- Toast the bran lightly before mixing for a nuttier, smoky aroma that awakens the senses.
- Gently fold the batter—overmixing can make muffins dense; lumps are okay and keep them tender.
- Use a toothpick to check for doneness—clean comes out, moist crumbs mean they’re perfect.
- For a crisp top, bake on the middle rack and avoid opening the oven door early in baking.
- Let the muffins rest in the tin for 5 minutes—this helps set their structure and makes removal easier.
- Add a splash of vanilla or cinnamon to boost flavor—small tweaks can turn simple into extraordinary.
- If muffins turn too dark too fast, loosely cover with foil halfway through baking to prevent over-browning.
Common mistakes and how to fix them
- FORGOT to preheat oven → Always preheat to ensure even baking.
- DUMPED batter too quickly → Fold gently to keep muffins fluffy.
- OVER-TORCHED tops → Cover with foil if browning too fast, check for doneness.
- MISSED checking with toothpick → Test center for moist crumbs before removing.
Quick fixes and pantry swaps
- If batter is too thick, splash in a little more milk and gently fold.
- When muffins turn out dense, swap baking powder for a fresh batch or add a pinch of baking soda.
- Splash a few drops of vanilla on top before baking for extra aroma.
- Patch over cracks with a dab of batter before returning to oven for a smoother top.
- Shield muffins with foil if they shimmer too quickly, then rescue with 5-minute cooling for perfect texture.
Prep, store, and reheat tips
- Prepare the batter up to a day ahead, cover tightly and store in the fridge to deepen flavors.
- Store cooled muffins in an airtight container at room temperature for up to 2 days, keeping their moisture intact.
- For longer storage, freeze muffins wrapped individually in plastic wrap, up to 3 months. Thaw at room temp or warm gently.
- Reheat muffins in the oven at 160°C (320°F) for 10 minutes until fragrant and warm; avoid microwave which can make them soggy.
- Sensory note: Reheated muffins should smell toasty and oat-y, with a soft, warm crumb that’s just right.
Top questions about bran muffins
1. Can I use raw bran instead of toasted?
Use toasted wheat bran for a richer, nuttier flavor that really stands out in each bite.
2. Is toasting the bran necessary?
Yes, but toasting the bran enhances the aroma and adds a smoky depth that makes the muffins special.
3. Why are my muffins dense and heavy?
If your muffins turn out dense, check your baking powder for freshness and don’t overmix the batter.
4. Can I substitute brown sugar?
Replace brown sugar with honey or maple syrup for a different sweetness profile that’s slightly more complex.
5. How long do bran muffins stay fresh?
Store muffins in an airtight container at room temperature for up to two days; freeze for longer keeping.
6. How should I reheat bran muffins?
Reheat in a 160°C (320°F) oven for about 10 minutes until fragrant and warm, avoiding microwave to keep texture.
7. What flavor tweaks can I add?
Adding a teaspoon of cinnamon or vanilla can boost flavor—just a little goes a long way.
8. Can I make these gluten-free?
Using oat flour or spelt flour adds nuttiness and texture; expect slightly denser muffins, so adjust liquids if needed.
9. My batter is too thick—what now?
If the batter is too thick, gently splash in more milk until it reaches a scoopable consistency.
10. How do I know when they’re done?
Always check for doneness with a toothpick; it should come out clean, with moist crumbs clinging.
Baking these bran muffins isn’t just about the taste; it’s a small act of mindfulness, a moment to slow down and connect with simple, wholesome routines. They carry a hint of nostalgia, reminding me of childhood mornings filled with the comforting aroma of baked goods.
In a world that constantly rushes, these muffins offer a gentle reminder to cherish slow mornings and honest flavors. Each bite brings a sense of grounding, making even the busiest days feel a little more manageable.

Hi, I’m Charlotte Hayes, the creator and storyteller behind Lost in the Aroma. If you’ve ever closed your eyes while something simmered on the stove just to take in the scent, then you already understand what this space is about. For me, aroma is memory. It is emotion. It is the first sign that something beautiful is about to be shared. Lost in the Aroma is where I bring together recipes, sensory storytelling, and my lifelong love for food. I am so glad you’re here.


Leave a Reply