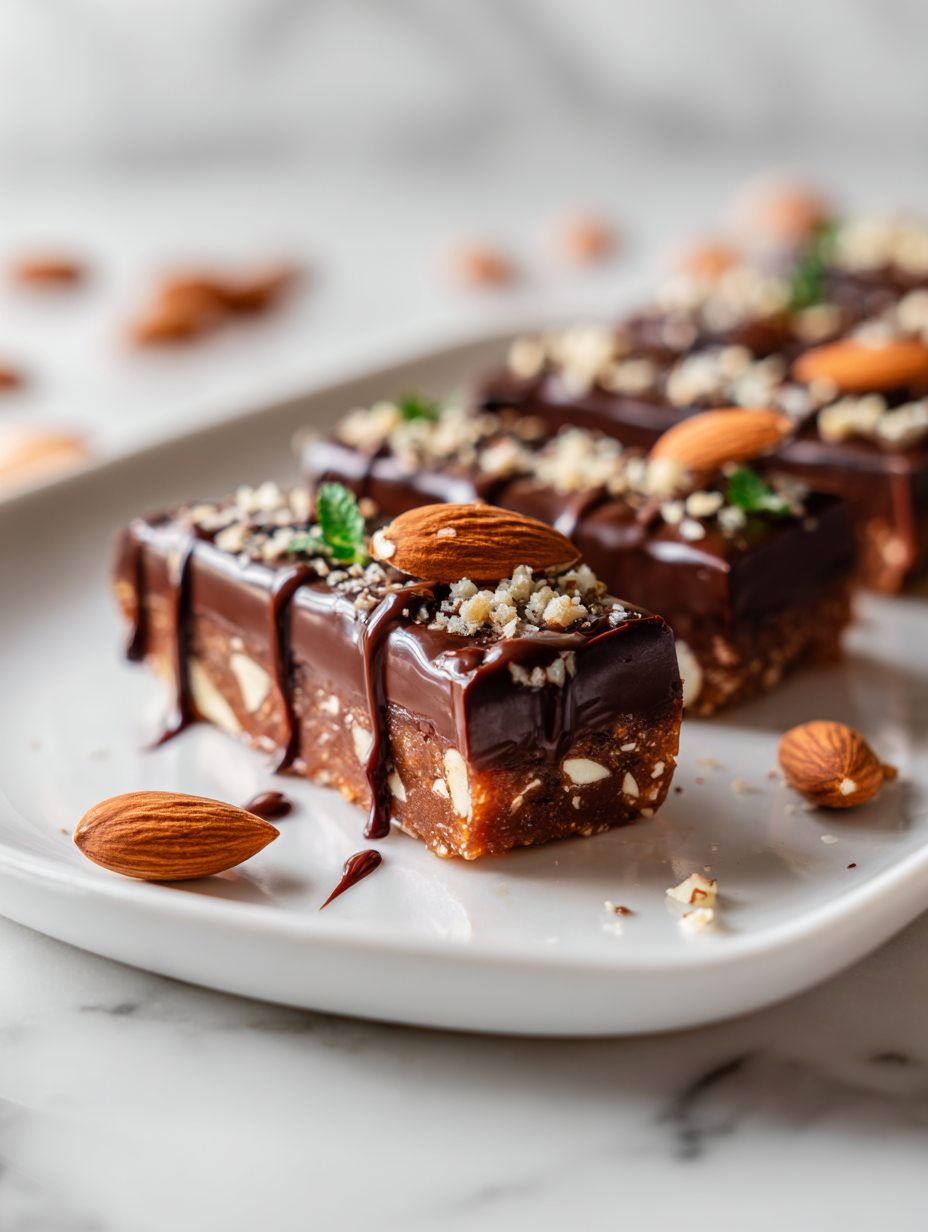
These Chocolate Almond Bars are a nod to childhood favorites but with a grown-up twist. I love that crunchy, nutty bite paired with rich, dark chocolate—it’s a balance that feels indulgent but not overwhelming. Making them at home means I can control the sweetness and toast the almonds just enough to bring out that smoky aroma.
There’s something satisfying about turning simple ingredients into something that feels special. I often find myself sneaking an extra piece late at night, relishing the crisp snap and the melt-in-your-mouth chocolate. It’s a recipe that’s perfect for sharing or keeping all to yourself, especially when you need a little nostalgic comfort with a touch of sophistication.
Focusing on the nostalgic comfort of childhood snack bars, but elevating them with a sophisticated blend of dark chocolate and toasted almonds for grown-up indulgence.
The story behind this recipe
- This recipe grew from a box of toasted almonds and a bag of bittersweet chocolate I found in the back of my pantry. I wanted something that felt like a treat but didn’t require a fancy store run. The moment I mixed everything together and saw that glossy chocolate layer settle over the crunchy almonds, I knew I was onto something.
- Growing up, my grandma’s kitchen was filled with the scent of toasted nuts and melting chocolate during holiday baking. I’d sneak bites from the mixing bowl, the warmth of the almonds and the rich aroma always pulling me back. This recipe is my way of capturing that cozy, nostalgic feeling and giving it a grown-up twist with dark chocolate and a sprinkle of sea salt.
- heading:
Key ingredients and tips
- Dark chocolate: I love the intense, slightly bitter edge it gives—almost like a deep breath. Swap for semi-sweet if you prefer a sweeter finish, but keep an eye on the melting point to avoid scorching.
- Almonds: Toasted until fragrant, they bring a smoky, crunchy bite that’s hard to beat. You can substitute with pecans or hazelnuts for a different nutty punch, just toast them well first.
- Sweetened condensed milk: I use it to create that sticky, rich base that holds everything together. For a dairy-free version, try coconut milk condensed or a thick coconut cream—just expect a hint of coconut flavor.
- Butter: It’s the backbone of the crust and helps everything meld. Use salted butter for a more seasoned bite, or swap for coconut oil for a cleaner, slightly sweeter crispness.
- Vanilla extract: It’s subtle but elevates the chocolate and nuts. Consider a splash of almond or orange extract for a surprising twist that brightens the bar’s flavor.
- Sea salt: Just a pinch really enhances the chocolate and nuts’ richness. A flaky sea salt on top right before chilling adds a beautiful crunch and bursts of flavor.
- Optional add-ins: Dried cranberries or sea salt caramel pieces can add a pop of tartness or extra decadence. Mix them in after spreading the chocolate layer for a surprise in every bite.
Spotlight on key ingredients
Dark chocolate:
- I love its intense, slightly bitter edge that melts smoothly, giving a rich depth. Swap for semi-sweet if you want a sweeter note, but watch the melting point to avoid scorching.
- Almonds: Toasted until fragrant, they offer a smoky crunch that really stands out. You can substitute with pecans or hazelnuts, just toast them well first for best flavor.
Almonds (again, emphasizing their role):
- Almonds: Toasted to bring out a fragrant, smoky aroma, they add crunch and a nutty richness. Keep an eye on them so they don’t burn during toasting.
- Sweetened condensed milk: It’s the sticky glue that holds these bars together, offering a rich, sweet base. Coconut milk condensed works well if you want dairy-free, but expect a coconut note.
Notes for ingredient swaps
- Dairy-Free: Swap regular butter for coconut oil or margarine. It might slightly alter the richness but keeps the texture smooth.
- Sweetener: Use honey or maple syrup instead of condensed milk. Expect a more floral or caramel note and slightly less stickiness.
- Chocolate: Dark chocolate can be replaced with semi-sweet or milk chocolate. Keep in mind, the flavor will be milder or sweeter.
- Nuts: Swap almonds for pecans or hazelnuts. Toast them well first to bring out their best aroma and crunch.
- Flavor Boost: Add a pinch of espresso powder to intensify the chocolate or a splash of orange extract for brightness.
- Salt: Use flaky sea salt on top before chilling for a burst of flavor contrast, or omit for a less salty finish.
- Add-ins: Dried cranberries or sea salt caramel pieces can be mixed in for extra tartness or decadence, added after pouring chocolate.
Equipment & Tools
- Baking pan: Holds the bars and provides structure for setting.
- Parchment paper: Prevents sticking and makes removal easier.
- Heatproof bowl: For melting chocolate smoothly over simmering water.
- Saucepan: To toast almonds and melt the chocolate.
- Spatula: For spreading chocolate and mixing ingredients.
- Knife: To cut the finished bars cleanly.
Step-by-step guide to Chocolate Almond Bars
- Equipment & Tools: line your 20×20 cm (8×8 inch) baking pan with parchment paper, ensuring some overhang for easy removal. Use a heatproof bowl for melting chocolate, a saucepan for toasting almonds, and a spatula for spreading.
- Toast the almonds: Preheat your oven to 180°C (350°F). Spread almonds on a baking sheet. Toast for 8-10 minutes, stirring halfway, until fragrant and golden. Cool completely.
- Melt the chocolate: Fill a saucepan with a couple of inches of water and bring to a simmer. Place the chocolate in a heatproof bowl set over the water. Stir gently until smooth. Remove from heat.
- Prepare the base: In a mixing bowl, combine 1/2 cup (115g) of butter, 1/4 cup (30g) of powdered sugar, and a pinch of salt. Beat until creamy. Mix in 1 teaspoon vanilla extract.
- Assemble the crust: Press the buttery mixture into the prepared pan evenly. Bake at 180°C (350°F) for 12-15 minutes until lightly golden. Let cool for 10 minutes.
- Layer with almonds: Roughly chop the toasted almonds and sprinkle them evenly over the cooled crust. Gently press them into the surface.
- Pour the chocolate: Carefully pour the melted chocolate over the almond layer, spreading with a spatula to create an even top. Ensure all almonds are covered.
- Chill and set: Transfer to the fridge. Chill for at least 2 hours, or until the chocolate is firm and the bars are set. For quicker setting, freeze for 30-45 minutes.
- Finishing touches: Use the parchment overhang to lift the slab out of the pan. Cut into squares with a sharp knife. Serve directly or store in an airtight container.
Let the bars rest at room temperature for 10 minutes before slicing, or chill in the fridge for sharper edges. Use the parchment overhang to lift them out for clean cuts. Serve immediately or store in an airtight container in the fridge for up to a week.
How to Know It’s Done
- Chocolate layer is glossy and firm to the touch.
- Almonds are toasted and fragrant, not burnt.
- Bars are firm and hold shape when cut.
Chocolate Almond Bars
Ingredients
Equipment
Method
- Preheat your oven to 180°C (350°F). Spread almonds evenly on a baking sheet and toast for 8-10 minutes, until fragrant and golden. Remove and let cool completely, then chop roughly.
- In a heatproof bowl set over simmering water, melt the chopped dark chocolate until smooth and glossy, stirring gently. Remove from heat and set aside.
- In a mixing bowl, beat the softened butter and powdered sugar together until creamy and light, about 2 minutes. Stir in the vanilla extract for added aroma.
- Press the buttery mixture evenly into a parchment-lined 20×20 cm (8×8 inch) baking pan. Bake for 12-15 minutes until lightly golden, then allow to cool for 10 minutes.
- Sprinkle the cooled, chopped almonds evenly over the crust, gently pressing them into the surface to ensure they stick.
- Pour the melted chocolate over the almond layer, spreading it smoothly with a spatula to cover all the nuts completely. Sprinkle a pinch of sea salt on top for enhanced flavor.
- Transfer the entire pan to the fridge and chill for at least 2 hours, or until the chocolate is firm and the bars are set.
- Once set, lift the bars out of the pan using the parchment overhang. Use a sharp knife to cut into 12 even squares, wiping the blade between cuts for clean edges.
- Serve immediately or store in an airtight container in the refrigerator for up to a week. For best presentation, let the bars sit at room temperature for 10 minutes before serving.
Pro tips for perfect bars
- Bolded Mini-Head: Use gentle heat when melting chocolate to prevent scorching and achieve a glossy finish.
- Bolded Mini-Head: Toast almonds until fragrant and golden—this enhances their smoky aroma and crunch factor.
- Bolded Mini-Head: When spreading melted chocolate, work quickly to prevent it from setting unevenly or cracking.
- Bolded Mini-Head: Chill the assembled bars until the chocolate is firm—this makes slicing cleaner and easier.
- Bolded Mini-Head: Add a pinch of sea salt just before chilling to intensify the chocolate’s richness.
- Bolded Mini-Head: Use parchment overhang to lift the bars easily from the pan, avoiding breakage.
- Bolded Mini-Head: If chocolate cracks when cutting, warm your knife slightly for smooth, clean slices.
Common mistakes and how to fix them
- FORGOT to check chocolate temperature → Use a thermometer to prevent scorching.
- DUMPED in cold ingredients → Warm the condensed milk slightly for better mixing.
- OVER-TORCHED almonds → Toast until fragrant, not burnt, for optimal flavor.
- MISSED chill time → Chill thoroughly for clean cuts and firm texture.
Quick fixes and pantry swaps
- If chocolate is thickening, splash in a few drops of warm milk to loosen it.
- When almonds burn quickly, patch with a sprinkle of salt and lower oven temp slightly.
- Splash a little more melted chocolate if the layer cracks during spreading.
- Shield the edges with foil if they over-torch or brown too fast during baking.
- When in doubt, swap toasted pecans for almonds for a different crunch and flavor dimension.
Prep, store, and reheat tips
- Prepare the base and toast almonds a day ahead; store almonds in an airtight container at room temperature and keep the crust refrigerated overnight to prevent sticking.
- The bars can be assembled up to 24 hours in advance; keep them covered in the fridge to preserve the chocolate’s shine and freshness.
- They stay best within 5 days when stored in an airtight container in the fridge; the chocolate may soften slightly, but still taste rich and satisfying.
- Reheat slices gently in a low oven (about 150°C/300°F) for 5-7 minutes, until just warm and the chocolate regains a slight shimmer, but avoid melting.
Top questions about Chocolate Almond Bars
1. How do I know when the chocolate is set?
Look for a glossy, firm chocolate layer that snaps when you break it. It should no longer feel sticky or soft.

2. What if my almonds burn during toasting?
If the almonds seem burnt or bitter, they were toasted too long or at too high a temperature. Cool them immediately and consider re-toasting briefly.
3. How long should I chill the bars?
Chill the bars in the fridge for at least 2 hours or until the chocolate is completely firm. For quicker setting, freeze for 30-45 minutes.
4. My bars crack when I cut them, how can I fix this?
If your chocolate cracks when slicing, warm your knife slightly with hot water and wipe dry before cutting.
5. How do I get neat, clean slices?
Use a sharp knife for clean cuts. Wipe the blade between cuts for smooth edges.

6. How should I store these bars?
Store bars in an airtight container in the fridge for up to a week. They may soften slightly but will stay delicious.
7. Can I use different types of chocolate?
You can swap dark chocolate for semi-sweet or milk chocolate, but expect a milder or sweeter flavor with less bitterness.
8. What are good dairy-free substitutions?
Dairy-free options like coconut oil can replace butter, but the texture might be slightly different—less rich and a bit more crumbly.
9. Should I add salt on top?
Adding a pinch of sea salt on top before chilling enhances the chocolate’s richness and adds a nice crunch.
10. My chocolate is grainy or lumpy, what do I do?
If the chocolate layer refuses to melt smoothly, ensure your water isn’t boiling too vigorously and stir gently.
These bars are more than just a sweet treat; they carry a bit of nostalgia with every crunchy almond and rich chocolate bite. Making them at home turns a simple snack into a small, satisfying moment of crafting and comfort. Keep a batch handy for when you need a quick lift or a quiet moment of indulgence.
In a world that often rushes by, it’s these little projects—like perfecting a homemade bar—that remind us how sweet the simple things can be. Enjoy the process, and let the smell of toasted almonds and melting chocolate fill your kitchen with warmth whenever you make them. Sometimes, that’s enough to make any day a bit brighter.

Hi, I’m Charlotte Hayes, the creator and storyteller behind Lost in the Aroma. If you’ve ever closed your eyes while something simmered on the stove just to take in the scent, then you already understand what this space is about. For me, aroma is memory. It is emotion. It is the first sign that something beautiful is about to be shared. Lost in the Aroma is where I bring together recipes, sensory storytelling, and my lifelong love for food. I am so glad you’re here.


Leave a Reply