Many cookie recipes focus on the big picture—sweet, melty, and comforting. But I’ve always been obsessed with those perfect chewy centers and just-baked crisp edges that make each bite a little more satisfying. Achieving that isn’t about adding fancy ingredients; it’s about understanding how sugar, butter, and temperature work together in your oven.
This recipe is my secret weapon—using a splash of dark corn syrup to boost caramelization and keep the middle tender. It’s a small tweak that makes the difference between an okay cookie and one that’s almost addictive. When I bake these, I love the smell of toasted sugar and melting chocolate filling the kitchen—it’s pure, honest comfort.
I’ve tested dozens of batches, chasing that elusive balance of chew and crunch. It’s not about perfection, really—that’s boring. It’s about finding a method that consistently brings out that warm, gooey, slightly caramelized bite every time. Sometimes I make a batch just for myself, to remind me that cookies aren’t just food—they’re a little moment of joy, crafted with care and a tiny bit of science.
If you’re tired of the same old cookie recipes that turn out flat or overdone, give this one a shot. It’s all about paying attention to your dough and oven, and trusting the process. Because honestly, nothing beats biting into a hot cookie with that perfect mix of chewy and crispy, especially when it’s made with a little extra love and a secret ingredient.
Focusing on the overlooked art of achieving perfectly chewy centers with just the right amount of crisp edges, using a secret ingredient that enhances caramelization and texture.
The story behind this recipe
- This recipe came from a late-night craving and a messy kitchen—sometimes, the best ideas are born from chaos. I was trying to make cookies that felt nostalgic but with a bit of a twist, using a method I’d been experimenting with for chewy centers. It’s funny how a simple tweak can turn a good batch into something you want to hide away and keep all to yourself.
- I remember my grandmother’s kitchen, the smell of vanilla and melting chocolate filling the air, and how her cookies always seemed just a little more special. I wanted to recreate that warmth but with a personal touch that’s more about texture than just flavor. Baking these feels like a quiet act of memory-making—sometimes you don’t need a fancy reason, just a good cookie that hits the spot.
- heading: The story behind this recipe
Key Ingredients and Tips
- Butter: I prefer unsalted, room temp for a creamy mix; you can use salted, but cut back on added salt. It gives a rich, velvety base that melts in your mouth.
- Dark brown sugar: Its molasses notes add depth and chewiness. Swap with light brown sugar if you want a milder, cleaner sweetness, but expect less caramel complexity.
- Chocolate chips: I love semi-sweet because they balance sweetness well; but if you crave intense cocoa, go for dark chocolate chunks for a smoky hit.
- Flour: I use all-purpose, but whole wheat can add a nutty flavor and a bit of chew. Just don’t overdo it or the cookies might turn denser than intended.
- Eggs: Fresh eggs help the structure and moisture. If you’re out, a flaxseed “egg” (1 tbsp flaxseed + 3 tbsp water) can work, but your cookies might be a tad denser.
- Vanilla extract: It brightens everything, makes the chocolate pop. Use pure vanilla for the best aroma; imitation can feel flat and dull in comparison.
- Baking soda: I add just enough to give a gentle rise and lightness. Too much and your cookies might spread too thin; too little and they’ll be dense and chewy.
Spotlight on key ingredients
Chocolate chips:
- I love semi-sweet for balance, but dark chocolate adds a smoky, intense cocoa punch that melts beautifully, creating gooey pockets.
- Their size and moisture content influence melting and texture—chop larger chunks for more gooey bites and richer flavor during baking.
Butter:
- I prefer unsalted, softened to room temp for even creaminess—its richness and aroma are the backbone of that buttery, toasty flavor.
- It melts into the dough, creating a tender crumb and golden edges; slightly browning it enhances caramel notes and deepens flavor.
Notes for ingredient swaps
- Dairy-Free: Swap butter for coconut oil or vegan margarine. Expect a slightly different richness and a hint of coconut aroma.
- Sugar Alternatives: Use coconut sugar or maple syrup instead of brown sugar. The texture may shift slightly, and flavor will be more caramel-like or syrupy.
- Chocolate: Replace chips with chopped dark chocolate or dairy-free chocolate. The intensity and meltiness will vary, but flavor stays rich.
- Flour: Whole wheat or oat flour can replace all-purpose flour. Expect a denser, nuttier cookie with a slightly different crumb.
- Eggs: Use flaxseed or chia seed eggs (1 tbsp ground seed + 3 tbsp water). Cookies may be a bit denser and less chewy but still delicious.
- Vanilla: Substitute with vanilla bean paste or almond extract for a different aromatic layer. Be careful with almond—strong flavor.
- Baking Soda: Use baking powder if you want slightly thicker cookies; they’ll rise less but stay more tender and chewy.
Equipment & Tools
- Large mixing bowl: To mix the dough ingredients thoroughly.
- Wooden spoon or hand mixer: To cream butter and sugar, and blend ingredients smoothly.
- Baking sheet: To bake the cookies evenly.
- Parchment paper: To prevent sticking and facilitate easy removal.
- Cooling rack: To cool cookies evenly and maintain crispness.
Step-by-step guide to baking
- Gather your equipment: a large mixing bowl, a wooden spoon or hand mixer, a baking sheet, parchment paper, and a cooling rack. Preheat your oven to 180°C (350°F).
- In the bowl, cream together 1 cup (225g) unsalted butter at room temperature with 1 cup (200g) dark brown sugar until the mixture is light and fluffy, about 2-3 minutes. Smell that rich caramel aroma.
- Add 1 large egg and 1 teaspoon vanilla extract. Mix until fully incorporated. The dough should look glossy and slightly airy.
- In a separate bowl, whisk together 2 cups (250g) all-purpose flour, 1 teaspoon baking soda, and a pinch of salt. Gradually add this dry mixture to the wet, mixing just until combined. Keep an eye on the texture—don’t overmix, or your cookies may turn dense.
- Fold in 1 ½ cups (270g) chocolate chips. Use a spatula or spoon to distribute evenly. The dough should be thick and studded with gooey chocolate spots.
- Scoop the dough onto your prepared baking sheet in rounded tablespoons or using a cookie scoop, spacing them about 5cm (2 inches) apart. Slightly flatten the tops with your fingers for even baking.
- Bake for 10-12 minutes. The edges should be golden and slightly crisp, while the centers remain soft and chewy. The smell of toasted sugar and melting chocolate will fill your kitchen.
- Remove from oven. Let the cookies rest on the baking sheet for 5 minutes to set, then transfer to a cooling rack. They’ll continue to firm up as they cool, developing that perfect chewy center and crispy edge.
- Once cooled slightly, serve warm or at room temperature. The cookies should be crispy at the edges, chewy inside, with a rich chocolate aroma.
- Enjoy the contrast of textures and the deep, caramelized sweetness—these cookies thrive when they’re just a little warm.
Let the cookies rest on the baking sheet for 5 minutes, then transfer to a cooling rack. Serve warm or at room temperature for best texture and aroma.
How to Know It’s Done
- Edges are golden and crisp, centers slightly soft but not raw.
- Chocolate chips are melted and oozy, not dried out or burnt.
- Cookies hold their shape when lifted, not spreading too thin or collapsing.
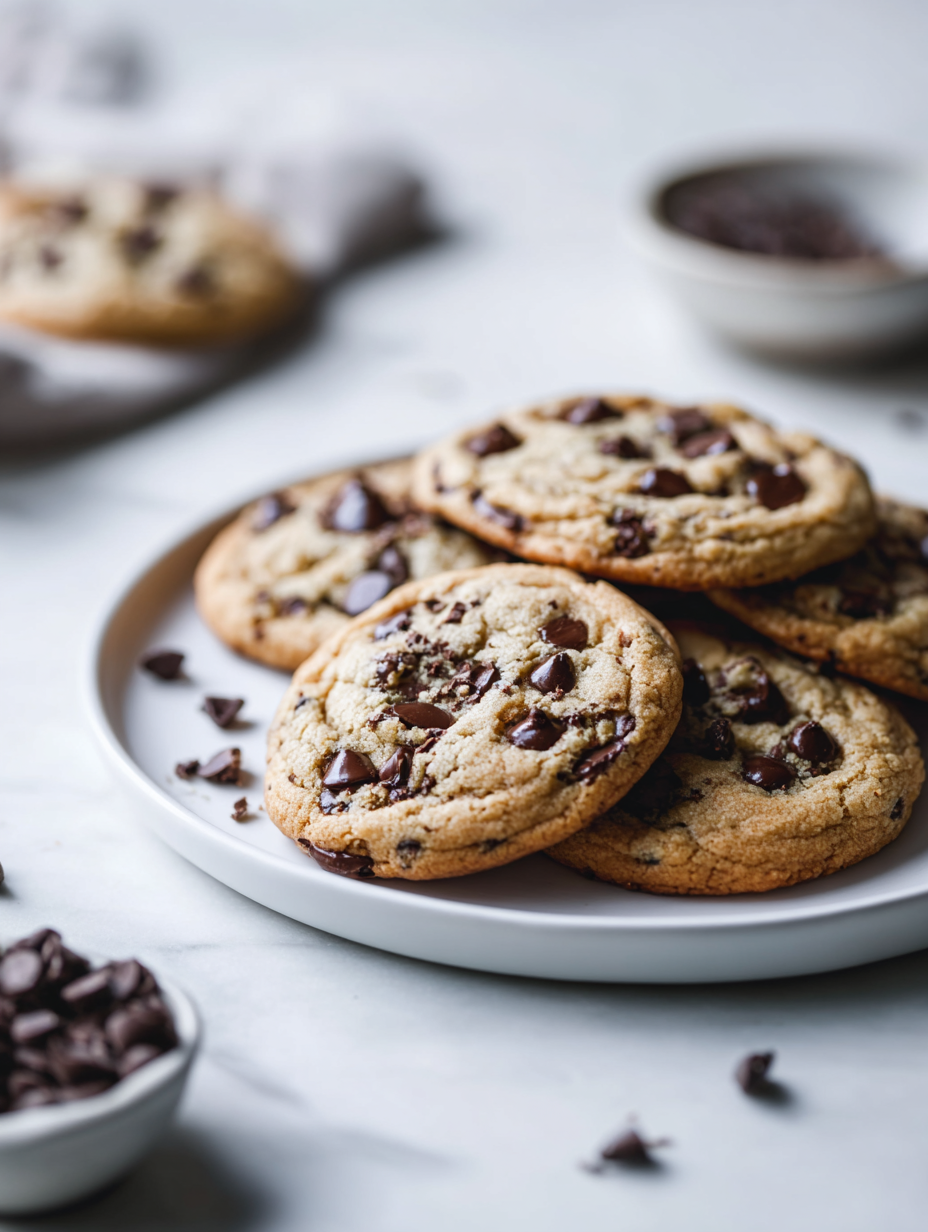
Chewy-Crisp Chocolate Chip Cookies
Ingredients
Equipment
Method
- Preheat your oven to 180°C (350°F) and line a baking sheet with parchment paper. Gather all your ingredients and tools ready for baking.
- In a large bowl, cream together the softened butter and dark brown sugar using a wooden spoon or hand mixer until the mixture is light, fluffy, and fragrant—about 2-3 minutes. The aroma should be rich and caramel-like.
- Add the egg and vanilla extract to the creamed mixture. Mix until well combined, resulting in a glossy, slightly airy dough. This helps incorporate air and develop a tender crumb.
- In a separate bowl, whisk together the flour and baking soda. Gradually add this dry mixture into the wet ingredients, mixing just until combined. Be careful not to overmix, as this keeps the cookies tender.
- Fold in the chocolate chips and a splash of dark corn syrup, distributing them evenly throughout the dough. The dough will be thick and studded with glossy chocolate chunks.
- Scoop rounded tablespoons of dough onto your prepared baking sheet, spacing them about 2 inches apart. Slightly flatten the tops with your fingers for even baking and a more uniform shape.
- Bake in the preheated oven for 10-12 minutes, or until the edges are golden brown and crispy, while the centers remain soft and chewy. You’ll notice a lovely toasted sugar aroma filling your kitchen.
- Remove the baking sheet from the oven and let the cookies rest for 5 minutes. This helps set the edges and prevents them from spreading too much.
- Transfer the cookies carefully to a cooling rack to cool completely or enjoy them warm, when the chocolate is gooey and inviting. The cookies should have a crispy edge with a chewy, caramelized center.
- Serve these cookies fresh for the best texture and aroma, and enjoy the perfect contrast of crispy and chewy bites with melting chocolate in every mouthful.
Notes
Tips for perfect cookies
- Bolded mini-head: Chill your dough for at least 30 minutes to slow spread and enhance flavor.
- Bolded mini-head: Use parchment paper to get evenly baked, crispy edges without sticking.
- Bolded mini-head: Slightly underbake—edges should be golden, centers soft for that perfect chew.
- Bolded mini-head: Mix chocolate chips into dough to prevent all from sinking to the bottom during baking.
- Bolded mini-head: Rotate your baking sheet halfway through for even coloring and heat distribution.
- Bolded mini-head: Rest cookies on the sheet for 5 minutes after baking to set edges and improve texture.
- Bolded mini-head: Keep an eye on oven temp; too hot can burn edges, too cool can underbake centers.
Common mistakes and how to fix them
- FORGOT to preheat oven → Always preheat for even baking.
- DUMPED too much flour → Measure accurately to avoid dense cookies.
- OVER-TORCHED edges → Remove cookies when edges are golden, centers soft.
- UNDER-baked center → Slightly underbake for chewy, not raw, centers.
Quick fixes and pantry swaps
- When cookies spread too thin → Chill dough for 30 minutes before baking.
- When chocolate isn’t oozy → Increase oven temperature slightly or bake a minute longer.
- When edges are burnt → Reduce oven temp by 10°C (20°F) and bake a minute less.
- When cookies are flat → Use fresh baking soda and avoid overmixing the dough.
- Splash a little milk or cream if dough is too crumbly and won’t hold shape.
Prep, store, and reheat tips
- Dough can be made a day ahead; wrap tightly and refrigerate for up to 24 hours to allow flavors to meld and dough to firm up, making scooping easier and cookies more uniform.
- Cookies stored in an airtight container at room temperature stay fresh for 3-4 days; the edges stay crisp, and the centers remain chewy, with a rich chocolate aroma that lingers.
- For longer storage, freeze baked cookies in a sealed bag for up to 3 months; reheat in a 175°C (350°F) oven for 5 minutes until warm and fragrant, restoring some of that freshly baked texture.
- Reheating cookies yields a cozy warmth and gooey chocolate pockets, but be careful not to overdo it—watch for melty chips and a crackling, inviting smell.
Top questions about chocolate chip cookies
1. Should butter be cold or softened?
Use room temperature butter for smooth creaming and even spreading.
2. How important is chilling the dough?
Chill the dough for at least 30 minutes to prevent spreading and enhance flavor.
3. How do I know when cookies are done?
Bake until edges are golden and centers look slightly underdone for chewy texture.
4. Does chocolate quality matter?
Use high-quality chocolate chips for richer flavor and better melting.
5. Should I add salt on top before baking?
Add a pinch of sea salt on top before baking to enhance sweetness and flavor complexity.
6. How should I store leftover cookies?
Store cookies in an airtight container for up to 4 days; reheat briefly for freshness.
7. Can I make these vegan?
You can substitute flaxseed eggs for a vegan version with minor texture changes.
8. How do I get evenly sized cookies?
Use a cookie scoop for uniform size and even baking.
9. What happens if I overbake?
Overbaking will make cookies too crispy; take them out just as they turn golden.
10. Can I customize this recipe?
Try adding chopped nuts or oatmeal for extra texture and flavor variations.
Baking these cookies is a small act of rebellion against the busy world, a moment to slow down and savor warm, melty chocolate. Each batch is a reminder that simple ingredients, treated with care, can create something truly comforting.
When you bite into one of these, you’re tasting more than just sugar and flour—you’re tasting a little bit of effort, patience, and a lot of love. It’s a humble treat, but sometimes, that’s exactly what’s needed to get through a hectic day.

Hi, I’m Charlotte Hayes, the creator and storyteller behind Lost in the Aroma. If you’ve ever closed your eyes while something simmered on the stove just to take in the scent, then you already understand what this space is about. For me, aroma is memory. It is emotion. It is the first sign that something beautiful is about to be shared. Lost in the Aroma is where I bring together recipes, sensory storytelling, and my lifelong love for food. I am so glad you’re here.


Leave a Reply